This is the full developer documentation for ReviewForest Help Center # Getting Started > New to ReviewForest? Learn how to set up your account and start planting trees. [Language settings at ReviewForest ](/getting-started/language-settings-at-reviewforest/)Set your app language, communication language, and how widgets display for end customers. Each team member picks their own without affecting others. # Install a ReviewForest Widget > Pick your website platform and follow the step-by-step guide to add a ReviewForest widget in minutes. Install the ReviewForest widget on your platform — pick yours below. [WordPress ](/widgets/how-to-integrate-a-widget-in-wordpress/)Add widgets using the Insert Headers and Footers plugin, no theme editing needed. [Shopify ](/widgets/how-to-integrate-a-widget-in-shopify/)Paste the widget code into your theme.liquid file before the closing body tag. [Wix ](/widgets/install-reviewforest-widgets-on-wix-websites/)Connect ReviewForest to your Wix site in about five minutes using an HTML Embed block. [Squarespace ](/widgets/how-to-add-widgets-to-squarespace/)Add widgets in a fixed spot or as a floating badge, with a video walkthrough. [Jimdo ](/widgets/how-to-integrate-a-widget-in-jimdo/)Paste the widget code into a Jimdo Widget/HTML element in a few clicks. [Joomla ](/widgets/how-to-integrate-a-widget-in-joomla/)Drop widgets into Joomla using a Custom HTML module and choose which pages they appear on. # Install ReviewForest widgets on Wix websites > Connect ReviewForest to your Wix site in about five minutes using an HTML Embed block, with both code snippets needed to display your reviews. Adding the ReviewForest widgets to your Wix.com website is really easy. You need about **5 minutes** to connect it. [Video Guide: Install ReviewForest on your Wix website](https://www.youtube-nocookie.com/embed/hoJHtqDmiOg) 1. Go to *Edit Site* on Wix.com 2. Choose where you want to add the widget and use the *+* Symbol to add a new section 3. Choose *HTML Embed* 4. Choose your preferred design style 5. Click the *HTML* label with the pen icon 6. Copy & paste the code from the widget code from your [ReviewForest web app](https://app.reviewforest.org/forest-widget) to the fiel that says “Paste your code” Note You have to insert *both* codes 7. You may want to play around with the width & height options 8 ) Click on *Publish* # Email & SMS > Set up email signatures and manage review invitations. [How to add an Email Signature to Gmail ](/email-sms/how-to-add-an-email-signature-to-gmail/)Paste your ReviewForest signature into Gmail in under a minute, so every email you send gives customers a friendly way to leave a review and plant a tree. [How to add an Email Signature to Outlook ](/email-sms/how-to-add-an-email-signature-to-outlook/)Add your ReviewForest signature to Outlook in a few clicks, so every email you send quietly invites customers to leave a review and plant a tree. [How to add an Email Signature to Apple Mail ](/email-sms/how-to-add-an-email-signature-to-apple-mail/)Set up your ReviewForest email signature in Apple Mail in a few clicks, so every email you send quietly invites customers to plant trees with reviews. [How to add an Email Signature to Thunderbird ](/email-sms/how-to-add-an-email-signature-to-thunderbird/)Copy your ReviewForest signature, paste it into Thunderbird, and add a friendly link to your forest under every email you send. [Email Invitations Statuses and Error Messages ](/email-sms/email-invitations-statuses-and-error-messages/)Understand every status and error message on your ReviewForest email invitations, from Sending and Delivered to bounces, spam reports, and unsubscribes. # Email Invitations Statuses and Error Messages > Understand every status and error message on your ReviewForest email invitations, from Sending and Delivered to bounces, spam reports, and unsubscribes. When you send out review invitations by email you will see different statuses after sending. This is a more detailed explanation of what they mean: | Status | Explanation | | ------------------------- | ------------------------------------------------------------------------------------------------------------------------------------------------------------------------------------------------------------------------ | | Sending | Message has been received and is ready to be delivered. | | Can’t be send | You may see the following drop reasons: Invalid SMTPAPI header, Spam Content (if Spam Checker app is enabled), Unsubscribed Address, Bounced Address, Spam Reporting Address, Invalid, Recipient List over Package Quota | | Temporarily can’t be send | Receiving server temporarily rejected the message. | | Doesn’t accept emails | Receiving server could not or would not accept mail to this recipient permanently. If a recipient has previously unsubscribed from your emails, the message is dropped. | | Delivered | Message has been successfully delivered to the receiving server. | | Email opened | Recipient has opened the HTML message. | | Link Clicked | Recipient clicked on a link within the message. | | Spam Reported | Recipient marked message as spam. | | Doesn’t want emails | Recipient clicked on the ‘Opt Out of All Emails’ link. | | Re-subscribed | Recipient resubscribed to a specific group by updating their preferences. Subscription Tracking needs to be enabled for this type of event. | # How to add an Email Signature to Apple Mail > Set up your ReviewForest email signature in Apple Mail in a few clicks, so every email you send quietly invites customers to plant trees with reviews. In order to add a signature to Apple Mail, first you need to copy one of the signatures provided by ReviewForest. 1. Visit and login into your account. 2. Choose “Email Signatures” within the left menu or directly visit to see the different signatures. 3. After you have chosen one of the signatures, you need to copy the signature into your clipboard with the button “Copy Signature”. ![Screenshot Copy Signature](/images/articles/en/how-to-add-an-email-signature-to-apple-mail-1.png) As soon as you have copied the signature you can add it into Apple Mail. 4. Open Apple Mail and go to “Preferences” and then to “Signatures”. 5. Choose the email account which you want to use the signature for. You find your selection of existing accounts in the left column. 6. Click on the plus (+) button below the central column to add a new signature and enter a name for the new signature. 7. Now you should see a (still empty) preview of the new signature in the right column. Uncheck the box “Always match my default message font” below the right column. 8. Insert the copied email signature into the right column. ![Insert copied Signature](/images/articles/en/how-to-add-an-email-signature-to-apple-mail-2.png) 9. With the button “Choose Signature”, which you can find in your dropdown menu below the columns, you can choose this email signature to serve as your standard. # How to add an Email Signature to Gmail > Paste your ReviewForest signature into Gmail in under a minute, so every email you send gives customers a friendly way to leave a review and plant a tree. In this article we will show you how you can add the ReviewForest signature into your Gmail account. In order to add a signature to Gmail, first you need to copy one of the signatures provided by us. 1. Visit and login into your account. 2. Choose “Email Signatures” within the left menu or directly visit to see the different signatures. 3. After you have chosen one of the signatures, you need to copy the signature into your clipboard with the button “Copy Signature”. ![Screenshot Copy Signature](/images/articles/en/how-to-add-an-email-signature-to-gmail-1.png) As soon as you have copied the signature you can add it into Gmail. 4. Open Gmail and click on the symbol for settings in the upper right corner of the page. 5. Choose “See all settings”. ![Settings - See all settings](/images/articles/en/how-to-add-an-email-signature-to-gmail-2.png) 6. A list of all setting options is shown to you. Scroll down to the option “Signature”. 7. Choose ”+ Create new” and add a name to the new signature. Now you should see the following input box. ![Insert copied signature into right column](/images/articles/en/how-to-add-an-email-signature-to-gmail-3.png) 8. Insert the copied ReviewForest signature into the right column. 9. Below the columns you can choose if you want this signature to be your standard signature for outgoing emails and / or for replies and forwarded emails. 10. In a last step you need to save the new created signature. Scroll down to the bottom of the page and click on ” Safe Changes”. # How to add an Email Signature to Outlook > Add your ReviewForest signature to Outlook in a few clicks, so every email you send quietly invites customers to leave a review and plant a tree. In the following, we will show you how to add an Email Signature to Outlook. 1. Open a new email in Outlook. 2. Click on “Message” at the top, then on “Signature” and finally on “Signatures”. 3. Select the option “Select signature to edit”, then go to “New” and enter a name for this new signature. 4. Then log in to , click on “Email Signature” and on “Copy Signature” (option 1 or 2) and paste it in Outlook under “Edit Signature”. ![](/images/articles/en/how-to-add-an-email-signature-to-outlook-1.png) 5. Select the email address for which the signature should be displayed in the “Email account” drop-down menu under “Choose default signature”. 6. Click on “OK”, and your signature is ready. # How to add an Email Signature to Thunderbird > Copy your ReviewForest signature, paste it into Thunderbird, and add a friendly link to your forest under every email you send — full walkthrough. In the following, we will show you how to add an Email Signature to Thunderbird. 1. To add an email signature to Thunderbird, first click on “Compose” to write a new message. 2. Now visit our website and log in. 3. Click on “Email Signature” on the left and copy one of the two signatures by clicking on “Copy Signature”. ![ReviewForest Email Signature](/images/articles/en/how-to-add-an-email-signature-to-thunderbird-1.png) 4. Go to the page , copy the copied signature into the left field. It then appears as HTML code in the right field. ![](/images/articles/en/how-to-add-an-email-signature-to-thunderbird-2.png) 5. Now copy the HTML code and paste it into the Thunderbird message window. Of course, you can also save the signature directly in your settings: 1. Click with the right mouse button on your mail account in the upper left corner and select “Settings” from the menu that appears. 2. Under your existing signature text, insert the signature copied from ReviewForest as HTML code under “Attach the signature from a file instead”. 3. Then click on “OK” and your email signature is ready. It will now be displayed under every email. # Apply a voucher during activation > How to enter your voucher code in the checkout window and see the discount instantly in the summary before you complete your ReviewForest subscription. #### How to apply your voucher when activating your ReviewForest subscription [Section titled “How to apply your voucher when activating your ReviewForest subscription”](#how-to-apply-your-voucher-when-activating-your-reviewforest-subscription) 1. Log in to your ReviewForest member area and first go to Do you see the small banner in the bottom left? 2. Click the “Choose plan” button On the next page: 3. Decide between monthly or annual payment and choose your plan ![](/images/articles/de/gutscheine-wahrend-der-aktivierung-anwenden-1.png) 4. On a new page, you can now enter your payment details. ![](/images/articles/de/gutscheine-wahrend-der-aktivierung-anwenden-2.png) 5. At the very bottom of the page you’ll find the field “Do you have a voucher code?” Enter your voucher code and click “Apply”. ![](/images/articles/de/gutscheine-wahrend-der-aktivierung-anwenden-3.png) The discount is shown immediately in the summary. Click “Done & pay” to complete the activation of your subscription. ![](/images/articles/de/gutscheine-wahrend-der-aktivierung-anwenden-4.png) Congratulations! You can now get started right away and use all the features. Your discount will be deducted from your plan costs for the duration of its validity period. Tip Under “Payment method & plan” you’ll find all the information about your discount for as long as it’s active. ![](/images/articles/de/gutscheine-wahrend-der-aktivierung-anwenden-5.png) # How to sign up for ReviewForest > Set up your account in six steps, connect your business, choose your planting project, and start your own review forest with ReviewForest. Follow these steps to set up your ReviewForest account and plant your forest! 1. **Start the sign-up process** * Go to * You’ll land on the ReviewForest sign-up page ![](/images/articles/de/so-meldest-du-dich-bei-reviewforest-an-1.png) We’re curious to hear about your goals! ![](/images/articles/de/so-meldest-du-dich-bei-reviewforest-an-2.png) 2. **Connect your business** * Pick a platform and follow the relevant instructions to connect your platform listing * If you have several locations, you can add them one after another ![](/images/articles/de/so-meldest-du-dich-bei-reviewforest-an-3.png) 3. **Create your review forest** * Your forest is created with a unique URL (e.g. reviewforest.org/your-business-name) * You can adjust the forest name if needed ![](/images/articles/de/so-meldest-du-dich-bei-reviewforest-an-4.png) 4. **Choose your planting project** * Each project has a different price per tree and a different focus ![](/images/articles/de/so-meldest-du-dich-bei-reviewforest-an-5.png) 5. **Set a planting limit if you like** * Decide whether you want to set a planting limit * If you do, choose between the preset options (50, 100, 500 trees) or enter a custom number * The minimum planting limit is 50 trees ![](/images/articles/de/so-meldest-du-dich-bei-reviewforest-an-6.png) 6. **Complete the setup and start growing** * Click “Start growing” to finish your setup ## What awaits you in your members area [Section titled “What awaits you in your members area”](#what-awaits-you-in-your-members-area) Once you’ve completed sign-up, you’ll have the chance to take a leisurely look around. **Overview**: Get a quick snapshot of your planted trees and the reviews you’ve received **Review forests**: Manage your individual review forests, configure planting settings, upload your logo, and much more… **Marketing tools**: * Website widgets: Show off the growth of your forest on your website * Email & SMS: Set up communication with your customers * Print templates: Access designs for physical marketing materials * Digital templates: Get templates for social media and online use **Account management**: Update your subscription, payment information, and other settings **Integrations**: Get access to our public API or manage your Google connection Take your time and explore all of ReviewForest’s features! When you’re ready, here’s the [guide to activating](/subscription-invoices/reactivate-your-reviewforest-subscription/) your subscription. # I can't find my business > Your business doesn't show up during sign-up? Make your address publicly visible in Google My Business, or sign in directly with GMB. If you can’t find your business during the registration process at step 4 *“Choose platforms / What is your business called on Google”*, this is most likely because you haven’t set a publicly visible address in your Google My Business profile. You can test whether this is the case for your business by entering the business address at the link below. If you find your business there, you’ll also be able to find and register it on ReviewForest using the same input. Tip [Place ID Finder by Google](https://developers.google.com/places/web-service/place-id) ### How to make your address public in Google My Business [Section titled “How to make your address public in Google My Business”](#how-to-make-your-address-public-in-google-my-business) * Sign in to your [Google My Business account](https://business.google.com/) * Go to *Info* in the left-hand navigation * There, below your business name, you’ll find the option to set an address by clicking the pencil icon ### Alternative [Section titled “Alternative”](#alternative) We understand if your business would rather not list its address publicly. In that case, you can also sign in directly with your Google My Business account. To do so, simply choose the option “sign in with my Google My Business account” offered to you in step 4 of the sign-up process. # Language settings at ReviewForest > Set your app language, communication language, and how widgets display for end customers. Each team member picks their own without affecting others. ReviewForest offers you various language settings to ensure the best possible experience for you and your end customers. Here you’ll learn how the different language options work and where to adjust them. ![Language preferences in your ReviewForest account settings](/images/articles/en/language-settings-at-reviewforest-1.png) ## App Language [Section titled “App Language”](#app-language) In the account settings, you can change the display language of the app. This setting is individual - each team member can choose their preferred language without affecting the view of others. ## Communication Language [Section titled “Communication Language”](#communication-language) Choose the language in which you want to receive invoices, password reset emails, team member invitations, and notifications about new reviews. ## Automatic Adjustment for End Customers [Section titled “Automatic Adjustment for End Customers”](#automatic-adjustment-for-end-customers) Your widgets (Tree Counter Widget, Forest Widget, Review Widget) and the review forest automatically display in the browser language of your end customers. You don’t need to configure anything here - we ensure that your end customers see everything in their preferred language. ## Language Settings in Feature Customizations [Section titled “Language Settings in Feature Customizations”](#language-settings-in-feature-customizations) When customizing digital templates, print templates, or other features, you can select a language directly during the customization process. These specific settings are independent of your general language settings. # Help Center > Find answers to your questions about ReviewForest — widgets, integrations, and more. ## Popular Topics [Section titled “Popular Topics”](#popular-topics) Getting Started New to ReviewForest? Learn how to set up your account and plant your first trees. Widgets Add ReviewForest widgets to your website on WordPress, Shopify, Wix, and more. Integrations Connect ReviewForest with your CRM, API, and other tools. Tree Planting Learn how trees are planted for reviews and how to plant trees for previous reviews. # Integrations > Connect ReviewForest with your CRM, API, and other tools. [Automate Your Review Requests with the ReviewForest API ](/integrations/automate-your-review-requests-with-the-reviewforest-api/)Send review requests automatically by email or SMS with the ReviewForest API. Trigger them from your CRM at the perfect moment, with no manual work. [How to Change the Google Business Profile Linked to Your Review Forest ](/integrations/how-to-change-the-google-business-profile-linked-to-your-review-forest/)Swap the Google Business Profile connected to your review forest when the old one is gone or merged. Our support team handles the switch for you. [Use ReviewForest in Workiz ](/integrations/use-reviewforest-in-workiz/)Connect ReviewForest to Workiz so every closed job triggers a review request by email or SMS. About five minutes to set up, and then it runs itself. [Send auto requests via CRM on Mailchimp ](/integrations/send-auto-requests-via-crm-on-mailchimp/)Automate ReviewForest review requests in Mailchimp in about five minutes. Tag your contacts, drop in our template, and let workflows do the asking. [Send auto requests via online store HubSpot ](/integrations/send-auto-requests-via-online-store-hubspot/)Set up automated review requests in HubSpot in about five minutes. Tag your customers, drop in our template, and let workflows handle the asking. [Send out auto requests via online store Shopify ](/integrations/send-out-auto-requests-via-online-store-shopify/)Automate ReviewForest review requests from your Shopify store using a marketing app like Sendinblue. Takes about five minutes from login to live. [Use API to show total amount of trees planted ](/integrations/use-api-to-show-total-amount-of-trees-planted/)Pull your live tree count straight from the ReviewForest public API and show it anywhere on your site, even without using our Tree Counter widget. # Automate Your Review Requests with the ReviewForest API > Send review requests automatically by email or SMS with the ReviewForest API. Trigger them from your CRM at the perfect moment, with no manual work. Would you like to receive more reviews while saving time? With the ReviewForest API, you can automate review requests and seamlessly integrate them into your existing systems. This article shows you how to automatically send digital review requests via email and SMS – completely without manual intervention and at the optimal time for maximum response rates. ## What You Need [Section titled “What You Need”](#what-you-need) * A ReviewForest account with an active plan * Your personal API key (found under “Integrations” in your ReviewForest account) * The ID of your review forest (how to find this is explained below) * A CRM system or other software that can send API requests ## ReviewForest API Overview [Section titled “ReviewForest API Overview”](#reviewforest-api-overview) Our public API allows you to programmatically use ReviewForest functions and integrate them into your existing systems. You’ll find: * The [API documentation](https://reviewforest.org/apidoc/#reviewforest-public-api) in your ReviewForest account under “Integrations” * An interactive “API Playground” for testing API calls ### How to Find Your Review Forest ID [Section titled “How to Find Your Review Forest ID”](#how-to-find-your-review-forest-id) For API integration, you need the ID of your review forest. Here’s how to find it: 1. Log in to your ReviewForest account 2. Go to “Review forests” in the left menu 3. Select the review forest for which you need the ID 4. The easiest way to find your review forest ID is through the API: * Use the API query `/v1/forests` to get a list of all your review forests with their IDs * In the response, you’ll see an `id` field for each review forest, e.g., `"id": "646223ed95d25a338950cf3f"` * This alphanumeric string is the ID you need for API calls Tip If you have multiple review forests, note the IDs with their respective names for easy reference later. ## Option 1: Automated Email Review Requests [Section titled “Option 1: Automated Email Review Requests”](#option-1-automated-email-review-requests) ### How to Set Up Automated Email Requests: [Section titled “How to Set Up Automated Email Requests:”](#how-to-set-up-automated-email-requests) 1. **Prepare API Key** * Log in to your ReviewForest account * Go to “Integrations” * Copy your API key for authentication 2. **Design API Request** For sending email review requests, a POST request is sent to the following endpoint: API Endpoint ```text https://api.reviewforest.org/v1/invitations/email ``` With these parameters: Request Body ```json { "forestId": "YOUR_REVIEW_FOREST_ID", "recipients": [ { "email": "customer@example.com", "name": "Max Mustermann" } ], "subject": "Your opinion matters to us", "language": "en", "templateType": "formal", "sendAt": "2023-06-01T10:00:00Z" // Optional: Time for sending } ``` ### Timing of Review Requests [Section titled “Timing of Review Requests”](#timing-of-review-requests) Timing is an important factor for the success of your review requests. With the ReviewForest API, you can send requests at exactly the right time: * **Optimal timing**: Send requests when customers have already been able to use the product/service, but the experience is still fresh * **Automation**: Integrate timing into your automation process with the `sendAt` parameter or through delayed triggers in your CRM #### Delay Options in ReviewForest [Section titled “Delay Options in ReviewForest”](#delay-options-in-reviewforest) You have three ways to control when your review requests are sent: 1. **Immediate Sending** Without specifying a `sendAt` parameter, the email is sent immediately after the API request. 2. **Delayed Sending via API** With the `sendAt` parameter, you can schedule the email for any time within the next 3 days, e.g.: * 1 hour later: `"sendAt": "2023-06-01T11:00:00Z"` (if the current time is 10:00 AM) * 5 hours later: `"sendAt": "2023-06-01T15:00:00Z"` * The next day: `"sendAt": "2023-06-02T10:00:00Z"` 3. **Delayed Trigger in CRM** Your CRM or automation system can trigger the API call at a specific time, e.g.: * 7 days after product delivery (ideal for electronics and clothing) * 14-28 days after delivery (ideal for care products) * Upon reaching certain usage milestones (ideal for digital products) Tip You can also combine both methods – delayed triggers and the `sendAt` parameter – for precise timing control of your requests. For example, you could set a trigger 7 days after delivery and additionally schedule the sending for 7 PM, when email open rates are typically higher. ## Option 2: Automated SMS Review Requests [Section titled “Option 2: Automated SMS Review Requests”](#option-2-automated-sms-review-requests) The process for SMS requests is similar to that for emails: 1. **Prepare API Request** For SMS review requests, a POST request is sent to the following endpoint: API Endpoint ```text https://api.reviewforest.org/v1/invitations/sms ``` With these parameters: Request Body ```json { "forestId": "YOUR_REVIEW_FOREST_ID", "recipients": [ { "number": "+491701234567", "name": "Max Mustermann" } ], "companyName": "Your Company", "language": "en", "templateType": "formal" } ``` 2. **Note SMS Quota** Remember that your SMS quota is limited depending on your plan: * Standard: 10 SMS per review forest * Premium: 50 SMS per review forest * Professional: 100 SMS per review forest Note You can also send more SMS than are included in your plan. For each SMS beyond the included quota, a fee of €0.15 per SMS will be charged. These are automatically billed with your next invoice. ## Benefits of Automation [Section titled “Benefits of Automation”](#benefits-of-automation) * **Time savings**: No more manual emails or SMS to send * **Consistency**: Every customer receives a request at the optimal time * **Higher conversion**: More reviews through timely and relevant requests * **Scalability**: The system grows automatically with your customer base * **Avoiding common timing errors**: Not asking too early (before the customer could use the product) and not too late (when the memory fades) ### Avoiding Common Timing Errors [Section titled “Avoiding Common Timing Errors”](#avoiding-common-timing-errors) Automation helps you avoid these common mistakes: * **Too early requests**: Review requests sent before the customer has received or sufficiently used the product can lead to negative reviews. * **Too late requests**: If you wait too long, the customer’s enthusiasm fades and the likelihood of a response drops dramatically. * **Lack of personalization**: Different products require different time windows for review requests. ## Next Steps [Section titled “Next Steps”](#next-steps) 1. Talk to your developer or IT team about integrating the ReviewForest API into your system 2. Test the API in the ReviewForest API Playground 3. Implement simple automation and expand it gradually Do you have questions about the API or integration? Our support team is happy to help! # How to Change the Google Business Profile Linked to Your Review Forest > Swap the Google Business Profile connected to your review forest when the old one is gone or merged. Our support team handles the switch for you. There are occasions when you may need to change the Google Business Profile linked to your review forest. Here’s how to know when and how to make this change. ## When You SHOULD Change the Google Business Profile [Section titled “When You SHOULD Change the Google Business Profile”](#when-you-should-change-the-google-business-profile) * **Reasons for Change**: Typically, updates are needed if your old profile was deleted or two profiles were merged. ## When You Should NOT Change the Google Business Profile [Section titled “When You Should NOT Change the Google Business Profile”](#when-you-should-not-change-the-google-business-profile) * **Minor Updates**: For simple changes like updating your business name or address, edit your *existing* Google Business Profile directly [on Google](https://support.google.com/business/topic/4596687?hl=en) instead. This approach maintains your reviews and ranking and you should always try to go this route first. Your existing review link on your review forest should continue to work, even after changes on Google, ensuring ongoing syncing of reviews. ## How to Change Your Google Business Profile [Section titled “How to Change Your Google Business Profile”](#how-to-change-your-google-business-profile) 1. **Identify the Need**: Ensure a change is necessary based on the guidelines above. 2. **Contact Support**: You can’t make this change yourself. Reach out to our support team via the chat button at the bottom right of your screen or email us at . 3. **Provide Details**: Send us your review forest’s URL (reviewforest.org/*yourname*) and the link to your new Google Business Profile. Search using ‘ *your business name* *your address* ‘ and copy the URL from your browser’s address bar. ![Google Business Profile Link Example](/images/articles/en/how-to-change-the-google-business-profile-linked-to-your-review-forest-1.png) ## What Happens After the Change? [Section titled “What Happens After the Change?”](#what-happens-after-the-change) * **New Review Button**: The review button on your page will lead to your updated Google Business Profile. Make sure to test it after changes. ![The link the button leads to will change](/images/articles/en/how-to-change-the-google-business-profile-linked-to-your-review-forest-2.png) * **Continue Planting Trees With the New Profile**: Your contribution to planting new trees through reviews will continue with your new profile. The existing trees in your review forest remain unaffected. ### Need More Help? [Section titled “Need More Help?”](#need-more-help) If you have any questions or need further assistance, feel free to contact our support team. We’re here to help you every step of the way! # Send auto requests via CRM on Mailchimp > Automate ReviewForest review requests in Mailchimp in about five minutes. Tag your contacts, drop in our template, and let workflows do the asking. Mailchimp lets you send you automated review requests when you assign clients a certain tag. **When should I ask for a review?** The best moment to send an automated review requests is when the visit to your store is still fresh in the memory of your customers. If you own a restaurant or similar, it is recommended to ask for a review within the next few hours. However, if you have sold a product to your customer, you should give him about a week to test the product and then ask for a review. **How do I send auto requests on Mailchimp?** That is what we will explain here. It takes around 5 minutes to setup. This is how you include ReviewForest in your Mailchimp review requests: 1. Login to Mailchimp. 2. Click on the **Automations** icon in your account dashboard. 3. Click on **Classic Automations**. 4. Choose **Email your tagged contacts** and then **Single Email**. ![](/images/articles/en/send-auto-requests-via-crm-on-mailchimp-1.png) 5. Enter a **Campaign Name** and click on the drop-down menu to select a target group. 6. Click on **Begin** and on **Design Email**. 7. In **Setup**, enter your **E -Mail**, **Email subject**, **Preview Text**, **From name** and **From email address**. 8. Click on **Next** and choose in **Template** your template. 9. In the **Design** step you can design your email. 10. Click on **Save and Return to Workflow**. 11. In order to change the settings for the automation workflow, go to **Emails** and then to **Edit Settings**. Enter Name of the Workflow, Sender Name, Sender address and Tracking Options. Now, you have to set the automation. 12. Check your checklist in **Confirm**. Click on **Resolve** or **Edit** in order to make changes to your automation. 13. In order to send the automation, click on **Start Sending** and then again in the pop-up window on **Start Sending**. # Send auto requests via online store HubSpot > Set up automated review requests in HubSpot in about five minutes. Tag your customers, drop in our template, and let workflows handle the asking. HubSpot lets you send you automated review requests when you assign clients a certain tag. In order to create automated emails to use in workflows, you need Marketing Hub Professional and Enterprise accounts. **When should I ask for a review?** The best moment to send an automated review requests is when the visit to your store is still fresh in the memory of your customers. If you sell food, it is recommended to ask for a review within the next few hours. However, if you have sold a product to your customer, you should give him about a week to test the product and then ask for a review. **How do I send auto requests on HubSpot?** That is what we will explain here. It takes around 5 minutes to setup. This is how you include ReviewForest in your HubSpot review requests: 1. Login to HubSpot. 2. In order to integrate our ReviewForest template, navigate to **Conversations** and then **Templates**. Click **New template** and then **From scratch**. Enter a name and subject for your template. 3. Click the **Select a folder** dropdown menu to add the ReviewForest template to a folder. 4. Now go to your ReviewForest dashboard, click **Copy Template** and paste it in your template. 5. Click **Save template**. 6. Now you can create you automated email: Go to **Marketing** and then **E-Mail**. ![](/images/articles/en/send-auto-requests-via-online-store-hubspot-1.png) 7. Click **Create email** and select **Automated**. 8 ) Select your template and enter in the dialog box an **Email name** and click **Create email**. 8. Click the **Recipients tab** and select **Save for automation**. ![](/images/articles/en/send-auto-requests-via-online-store-hubspot-2.png) 10. Click **Next** to review your email settings and then **Save for automation** in order to publish the automated email. # Send out auto requests via online store Shopify > Automate ReviewForest review requests from your Shopify store using a marketing app like Sendinblue. Takes about five minutes from login to live. Shopify lets you send you automated review requests when you assign customers a certain tag. **When should I ask for a review?** The best moment to send an automated review requests is when the visit to your store is still fresh in the memory of your customers. If you sell food, it is recommended to ask for a review within the next few hours. However, if you have sold a product to your customer, you should give him about a week to test the product and then ask for a review. **How do I send auto requests on Shopify?** That is what we will explain here. It takes around 5 minutes to setup. This is how you include ReviewForest in your Shopify review requests: Note In order to create automations, you need a [marketing app](https://apps.shopify.com/collections/works-with-shopify-marketing), and your store needs to be on the Basic Shopify plan or higher. Since automated emails are not currently integrated with Shopify themes, you need an additional app like **Shopify Inbox** or **Sendinblue**. In this help article, we use Sendinblue as an example. 1. Login to Shopify. 2. Login to Sendinblue and connect it with your Shopify account. 3. In Sendinblue, click “Automation”, “Workflows”, “Create a workflow” and “Product Purchase” 4. Click “create”. 5. Choose a custom event like “order\_completed”. ![](/images/articles/en/send-out-auto-requests-via-online-store-shopify-1.png) 6. Click on “Next” and choose the period of time your message will be sent, for example one week. ![](/images/articles/en/send-out-auto-requests-via-online-store-shopify-2.png) 7. Click on “Next” and “Create a new email template”. In Setup, enter all required details. 8 ) In Design, “Start from scratch” and drag and drop the HTML field into your message. Erase the code that appears automatically. Now, copy the ReviewForest template in your ReviewForest Dashboard, go on and paste it on the left in order to receive the HTML code of the template. Copy the code and paste it in the HTML field of your message. You can also add text, social media icons, buttons and so on. 8. By clicking on “Continue”, you see the preview of the message. To make sure that everything is fine, “send a test” in the upper right. When you are happy with your template, click on “Save & Activate”. ![](/images/articles/en/send-out-auto-requests-via-online-store-shopify-3.png) 10. Click on the Plus in the upper part in order to connect your email account with Sendinblue by following the instructions. ![](/images/articles/en/send-out-auto-requests-via-online-store-shopify-4.png) # Use API to show total amount of trees planted > Pull your live tree count straight from the ReviewForest public API and show it anywhere on your site, even without using our Tree Counter widget. In some cases, you may want to display the total number of trees you have already planted without using our Tree Counter widget. This may be the case if you have a special area on your website where you showcase your business’ sustainable efforts and implement a custom solution to display the number of trees you’ve planted. **Using our public API, you can display the actual number of trees you have planted.** Since the ReviewForest public API is still in beta, please contact customer support to get a personal token. Later, you will get & manage your API keys inside your account in app.reviewforest.org. 1. Contact customer support to receive your personal token 2. Lookup your forests slug e.g. if your forest URL is , then the forest slug is *my-forest* 3. In order to connect to our public API, access: Method: GET curl -H ‘apikey: YOUR\_API\_KEY’ # Use ReviewForest in Workiz > Connect ReviewForest to Workiz so every closed job triggers a review request by email or SMS. About five minutes to set up, and then it runs itself. Workiz lets you sent you automated review requests when you assign clients a certain tag. It takes around **5 minutes** to setup. This is how you include ReviewForest in your Workiz review requests: 1. Login to Workiz. 2. Click the **Settings icon** in the top right and choose **Settings** 3. Choose **Notifications** under General Settings. Note If you already setup review requests in the past you **must skip steps 5-8**. Simply click on the request to edit it. 4. Click the **+Add New** Button. 5. Notify: Select **Assigned Client** 6. Notify by: Select **SMS** or **Email**, depending on your preference 7. By: Select **Status** 8. Status: **Done** This means that once you close a job, the email/SMS will be automatically sent 9. Subject & Message: Here’s where you edit the template. Here’s an example, please feel free to customize it to make it feel more personal. Make sure to edit the web address of the review forest with your own. **Subject**: Review {{biz\_name}} and plant a tree Email template ```text Hello {{first_name}}, Your {{job_type}} has now been completed. If you have any question about the service you received, please don’t hesitate to contact us. We would really appreciate it, if you leave a review for us. As a sign of appreciation we will plant a real tree in your name. Go here to leave a review and plant a tree: https://reviewforest.org/demo-page/ Thank you for your business. We look forward to working with you again in the future. Sincerely {{biz_name}}. ``` Tip Make sure to replace the web address /demo-page/ with your own. You’ll find the address at [app.reviewforest.org](https://app.reviewforest.org) # Marketing Templates > Print materials, social media posts, and promotional tools. [How to use Canva to edit templates ](/marketing-templates/how-to-use-canva-to-edit-templates/)Edit ReviewForest Canva templates in minutes: open the template, swap the tree count, add your forest URL, and download the pages you actually need. [How to create your own social media posts ](/marketing-templates/how-to-create-your-own-social-media-posts/)Build your own ReviewForest social media posts with planting project photos, a clear caption, and a call to action that turns reviews into trees. [Physical tree counter - How to buy & setup ](/marketing-templates/physical-tree-counter-how-to-buy-setup/)Connect a Smiirl physical tree counter to your review forest with the REVIEWFOREST promo code, then link it via PUSH NUMBER and the CURL endpoint. [Printing Process outside Germany, Austria and Switzerland ](/marketing-templates/printing-process-outside-germany-austria-and-switzerland/)From February 2025 ReviewForest ships print materials only inside Germany, Austria and Switzerland, but you can print the files at any local shop you trust. [How to order print products from the UK ](/marketing-templates/how-to-order-print-products-from-the-uk/)Order ReviewForest print materials in the UK through Tradeprint in seven simple steps, from picking quantity to uploading artwork and checking out securely. # How to create your own social media posts > Build your own ReviewForest social media posts with planting project photos, a clear caption, and a call to action that turns reviews into trees. ## Create and share your own social media posts [Section titled “Create and share your own social media posts”](#create-and-share-your-own-social-media-posts) Social media templates - ReviewForest social media templates or your own - will always be directed to the wider audience of your customers. Unlike email signatures or business cards, you can reach out to a much wider audience on social media platforms, like Instagram, Facebook, LinkedIn, Twitter, TikTok etc. In this article we want to explain why it is a good idea to post about your cooperation with ReviewForest and your planting trees for reviews and to show you a general approach of creating your own social media posts. ## There are various approaches! [Section titled “There are various approaches!”](#there-are-various-approaches) **Table of content:** 1. Why is it a good idea to post about your cooperation with ReviewForest and your planting trees for reviews? 2. General guidelines when using ReviewForest assets 3. How to create your own ReviewForest social media posts - the basics * 3.1. Use pictures from the planting project * 3.2. Generate messages to create interest, by using simple yet catchy post captions * 3.3. Call to action, to get your audience to participate! 4. General tips ## 1. Why is it a good idea to post about your cooperation with ReviewForest and you planting trees for reviews? [Section titled “1. Why is it a good idea to post about your cooperation with ReviewForest and you planting trees for reviews?”](#1-why-is-it-a-good-idea-to-post-about-your-cooperation-with-reviewforest-and-you-planting-trees-for-reviews) As with your other social media posts, your social media channel is - among others - there for: i) share information about your product and/or service ii) show new achievements of your business iii) signal commitment through continuity of posting about certain topics iv) give room for feedback and interaction vi) make upheld values visible vii) connect with your customers and wider audience Posting about your business planting trees for reviews is always a good idea, especially when you * want to show your business’ green impact * communicate your efforts in tackling the climate crisis * emphasise your actions as a sustainable business which is investing in saving the planet by growing trees and protecting natural ecosystems Within the description of the planting projects you can find more keywords on climate, biodiversity, social justice, ecology topics. Alternatively, use our short factsheets and articles on the planting projects for more details. Those informations are great to take up in a social media post as they highlight what planting trees is all about and how your business takes part in realizing these green and social goals. Within the ReviewForest Brand Book & Assets folders, you’ll find more illustrations, our logo, fonts and colour settings. ## 2. General guidelines when using ReviewForest assets [Section titled “2. General guidelines when using ReviewForest assets”](#2-general-guidelines-when-using-reviewforest-assets) There are some general rules when using ReviewForest assets. Head to the ReviewForest Brand Book for more detailed information. Here we want to refer to the most important ones for the successful implementation and use of the ReviewForest visual identity to ensure consistent application across all aspects of our business. * Always write our brand name as ReviewForest without any spacing in between the letters and with a capital F. * “We plant a review forest.” When referring to your own review forest you should write it with no capital letters and with spacing. * You are allowed to say that trees are planted by \[your chosen planting project]. Your cooperation is with ReviewForest and not directly with the planting project. * You can use the images we provide you with the brand book to talk about planting trees and ReviewForest. ## 3. How to create your own ReviewForest social media posts - the basics [Section titled “3. How to create your own ReviewForest social media posts - the basics”](#3-how-to-create-your-own-reviewforest-social-media-posts---the-basics) Every ReviewForest social media post should consist of visuals (pictures, graphics or video), an informative caption (what is it about) and a “call for action” (what you want your audience/customers to do). Basically you always want to include three things in a social media post: 1. pictures, graphics or video 2. an informative message 3. call to action ![social media posts](/images/articles/en/how-to-create-your-own-social-media-posts-1.png) To make sure your post stands out, use our picture folders and articles from the planting projects, and your unique ReviewForest QR-code and/or review link! Furthermore, we offer you ReviewForest graphics and our logo to be able to fully customize your content. Everything is included within the ReviewForest Brand Book & Assets folders. ### 3.1. Use pictures from the planting project [Section titled “3.1. Use pictures from the planting project”](#31-use-pictures-from-the-planting-project) All pictures from the planting projects can be found within the ReviewForest Brand package. Here you’ll find a selection of pictures from the planting site for each planting project. Please only use the pictures from the planting project you have chosen to plant trees with. Choose pictures according to your audience or the purpose of your post. Within our Brand package, you’ll also find ReviewForest illustrations and logo versions, ready for you to include into your social media posts as well. ### 3.2. Generate messages to create interest, by using simple yet catchy post captions [Section titled “3.2. Generate messages to create interest, by using simple yet catchy post captions”](#32-generate-messages-to-create-interest-by-using-simple-yet-catchy-post-captions) Note: As with the pictures, you can set a different content depending on the planting project you have chosen. In the following, we present general examples you can use, no matter what project you have chosen. See our factsheets on the different planting projects for specific planting project related content. **For your social media post, you want your messages to consist of:** #### a) Lead Caption [Section titled “a) Lead Caption”](#a-lead-caption) A short and eye-catching message on what the post is about. Examples: * “Plant a tree with us!” * “Help us to help nature!” * “Join our fight against the climate crisis!” * “With your help we’ll plant a forest!” #### b) Content and Context [Section titled “b) Content and Context”](#b-content-and-context) i) Write with a few words what you’ll do in order to reach your goal. Keep it short but informative. Examples: * “For every online review we’ll plant a tree in cooperation with @ReviewForest.” * “Every online review plants a tree.” * “You review, we plant.” * “Review us and we’ll plant a tree in your name.” *Note: if you want us to re-share your content on our social media channels, don’t forget to tag or mention us. Use @reviewforest on Facebook, @ReviewForest on LinkedIn, @reviewforest*org on Instagram or simply use the #ReviewForest hashtag\_ ii) Share more details about how your business will realize this. Examples: * “Every tree is one of \[xy amount] different tree species - planted by \[your chosen planting project] in \[location of planting]!” * “The trees will be planted during \[planting season of your planting project] in \[location of planting] by \[chosen planting project].” ### 3.3. Call to action, to get your audience to participate! [Section titled “3.3. Call to action, to get your audience to participate!”](#33-call-to-action-to-get-your-audience-to-participate) If you want your audience to do more than liking, sharing, or commenting on your posts, invite them to take actions and plant trees by reviewing your company. We offer two ways to doing so: Option 1: Include your review forest URL in your social media post This way your audience can find more information on the project, on the number of trees you have already planted and will be able leave a review for your business right away. Option 2: Use your unique ReviewForest QR-Code (copy it from your ReviewForest dashboard). And insert it in your social media post to create an easy access to your company’s review forest. … or, if you want, combine the two of them! ***After you have put everything together, your post is ready to be shared!*** ![social media post](/images/articles/en/how-to-create-your-own-social-media-posts-2.png) ### 4. General tips [Section titled “4. General tips”](#4-general-tips) * Write eye catching, compelling and short main captions to generate interest and desire to read the rest of your post. * Mix it up! Use our factsheets or snippets from our articles on the planting projects to share interesting facts about forests, reforestation projects, forest ecosystems etc. Surprise your audience with tree related facts they didn’t know before. Sharing knowledge is a great way to spark interest in your followers. * Include posting regularly about planting trees with ReviewForest into your existing marketing campaign, surveys, special occasions etc. to continually remind your customers to leave a review for your business. * Follow international climate and environment protection projects or ReviewForest to stay up to date about forest related actions. Keep in mind that there are national tree days, an international day of forests, climate (action) days etc. These days represent a good opportunity to share your involvement in climate movements with your audience on your social media channels. * If you want to create your own custom posts with pictures or videos there are several free or paid options on the market to create outstanding visual content. We like Canva, Crello, Design Wizard, Snappa just to name a few. * Head to the ReviewForest Brand Book & Assets folders where you’ll find more illustrations, our logo, fonts and color settings. * For more ReviewForest updates and interesting forest facts follow us on our social media channels on Facebook, on LinkedIn and on Instagram # How to order print products from the UK > Order ReviewForest print materials in the UK through Tradeprint in seven simple steps, from picking quantity to uploading artwork and checking out securely. ## To order our print materials from the UK hassle-free, we have prepared a step by step guide – it’s not complicated at all! Please make sure you have downloaded the file for your desired product in our app. [Section titled “To order our print materials from the UK hassle-free, we have prepared a step by step guide – it’s not complicated at all! Please make sure you have downloaded the file for your desired product in our app.”](#to-order-our-print-materials-from-the-uk-hassle-free-we-have-prepared-a-step-by-step-guide--its-not-complicated-at-all-please-make-sure-you-have-downloaded-the-file-for-your-desired-product-in-our-app) 1. Access the Ordering Portal: Click on the provided link in our app to access our trusted printing partner’s website. The link contains all necessary specifications like material, size, etc., so no need to worry about that. 2. Select Quantity and Shipping: Choose the quantity of the print products you need and your preferred shipping method for delivery. ![Quantity and Shipping Options](/images/articles/en/how-to-order-print-products-from-the-uk-1.png) 3. Artwork Upload: Opt for “Upload Artwork” and “Just Print” options. You’ll upload the file we provide in a later step. ![Artwork Upload](/images/articles/en/how-to-order-print-products-from-the-uk-2.png) 4. Add to Basket and Checkout: Once you’ve made your selections, add the items to your basket. ![Add to Basket](/images/articles/en/how-to-order-print-products-from-the-uk-3.png) Proceed to checkout by clicking on the top right corner of the screen. ![Checkout via Basket](/images/articles/en/how-to-order-print-products-from-the-uk-4.png) 5. Secure Checkout: Click “Checkout Securely” to proceed with the payment process. ![Checkout Securely](/images/articles/en/how-to-order-print-products-from-the-uk-5.png) 6. Upload Artwork and Confirm: Upload your artwork as instructed and press “Continue To Delivery & Payment”. ![Upload Artwork](/images/articles/en/how-to-order-print-products-from-the-uk-6.png) 7. Provide delivery and billing addresses, pick a delivery service, and finalize the payment. Last step: Sit back and wait for your high-quality materials to be delivered right to your doorstep. *** \*\*Here is the list of print products and their link to the print company \*\* * [Business Cards with and without QR code](https://www.tradeprint.co.uk/business-card-printing/recycled-business-cards?queryID=4eb7a012fb4c1eab5e80be75733db7f0\&Size=85mmx55mm\&SidesPrinted=DoubleSided\&Quantity=100\&Service=Saver) * [Postcards](https://www.tradeprint.co.uk/flyer-printing/recycled-flyers?queryID=fdecca74b4d076ffeaf19eb1f6d8d459\&Size=A5\&SidesPrinted=DoubleSided\&Quantity=50\&Service=Saver) *** If you have any questions or need further assistance, don’t hesitate to reach out to our customer support team. We’re here to help! # How to use Canva to edit templates > Edit ReviewForest Canva templates in minutes: open the template, swap the tree count, add your forest URL, and download the pages you actually need. [VIDEO TUTORIAL: How to use Canva for your ReviewForest templates](https://www.youtube-nocookie.com/embed/-xC8TSa_cAI) Note Canva is a design platform that allows users to create professional-looking graphics without any prior design knowledge. With Canva, you can create beautiful social media graphics using our pre-made templates to tell your customers about your tree planting and to remind them to leave a review. As you go to our Digital templates, you will see a template with the Canva logo. Click on the “Get Canva template” button to proceed. You will be redirected to the external website and see a cover, some guidance on how to use the templates and a preview of templates. Click Use template. You will be asked to create a free account or login. Continue with the option you prefer. Each template has editable parts, like text. You can adjust it to your needs. It is Important to change the number of planted trees in the past year. You can find this information by going back to ReviewForest app > inside this digital template description. Tip Do not forget to add your forest URL, so customers can leave a review for you. If there are templates which have a specific planting project, like these ones, please use the one you are currently planting with. When you finish editing and adjusting the template, you can download the final version. Click Share > Download. Default settings would work. Here you can select whether you want to export all pages or select a specific page. We would recommend exporting only relevant pages you have adjusted. Hit download and you are all set! 🙌 If you have any suggestions or ideas for our next templates - contact our support and your request will be given to our design team. # Physical tree counter - How to buy & setup > Connect a Smiirl physical tree counter to your review forest with the REVIEWFOREST promo code, then link it via PUSH NUMBER and the CURL endpoint. [Physical tree counter overview](https://www.youtube-nocookie.com/embed/ETIKHy9fOSA) The physical tree counter can be connected to your review forest. Even your brand forest, if you have one. It updates at least once a day to reflect the current amount of trees you have planted. The tree counter is manufactured by Smiirl. Setting it up is quite easy. ## How to order [Section titled “How to order”](#how-to-order) The counter can be ordered directly from Smiirl. As ReviewForest customer you get a special deal. You only pay 359€ (+ VAT, if applicable) instead of 399€. In order to claim the deal, use this link: 1. Choose Custom Counter ![](/images/articles/en/physical-tree-counter-how-to-buy-setup-1.png) 2. Make sure the promo code ‘REVIEWFOREST’ is applied. 3. Click *Edit logo* ![](/images/articles/en/physical-tree-counter-how-to-buy-setup-2.png) 4. Now choose *Images* in the menu on the left. Instead of *Designs by Smiirl* choose *ReviewForest* ![](/images/articles/en/physical-tree-counter-how-to-buy-setup-3.png) 5. Drag & drop the illustration of the tree onto the counter. 6. Increase the size so it fills out the box. ![](/images/articles/en/physical-tree-counter-how-to-buy-setup-4.png) 7. Confirm the design by clicking the checkmark in the top corner on the right. 8. Continue with the order process by clicking ‘Proceed’ and fill out your dates to complete the order. ## How to connect the tree counter to your review forest [Section titled “How to connect the tree counter to your review forest”](#how-to-connect-the-tree-counter-to-your-review-forest) Your tree counter has arrived. Exciting! Let’s get it connected to your review forest. Note The setup method is called ‘PUSH NUMBER’ **If you prefer videos**, watch this and then continue with step 5: [Smiirl counter set up](https://www.youtube-nocookie.com/embed/6cJ-PheER7w) **If you prefer text**, follow these steps: 1. Go to [smiirl.com/start](https://www.smiirl.com/start) and sign up. This is not related to your account at ReviewForest. **You need to setup a new account.** 2. Click on the button *Install* . 3. Enter the ID of the tree counter. It can be found at the back of the counter and on the user guide. 4. Follow the instructions to either connect *Via WiFi* or *Via Ethernet* 5. Once you have successfully managed to connect your counter to the internet, it’s time to connect it to your review forest. In order to so, it will come in handy to have the ReviewForest app open in another browser window. That way you can copy the data from Smiirl and insert it inside your ReviewForest account. ![Transfer data from Smiirl to ReviewForest](/images/articles/en/physical-tree-counter-how-to-buy-setup-5.png) 6. **In your [ReviewForest account](https://app.reviewforest.org/signin)** navigate to “Physical tree counter” 7. Choose which forest you want to connect to your Smiirl counter. Note: you can only connect one forest to one counter. ![Select among your forests](/images/articles/en/physical-tree-counter-how-to-buy-setup-6.png) 8. **In your Smiirl account** go to “My Counter”, “Settings” and then click on “Option” for *PUSH NUMBER* 9. Click on the push number icon ![push icon](/images/articles/en/physical-tree-counter-how-to-buy-setup-7.png) 10. Instead of entering your tree number manually, we provide you with a custom solution. Press “CURL Endpoint”. A list of data displays below. !["Curl Endpoint" --> Get token and identifier](/images/articles/en/physical-tree-counter-how-to-buy-setup-8.png) 11. Copy the data of “Counter identifier” & “Counter token” from Smiirl and insert into your ReviewForest account under “Physical tree counter” 12. After you’ve entered the data into your ReviewForest account , press “Connect counter to review forest” ![Last step: confirm connection](/images/articles/en/physical-tree-counter-how-to-buy-setup-9.png) **That’s it!** Now your tree counter will update automatically with the total amount of trees you’ve planted! # Printing Process outside Germany, Austria and Switzerland > From February 2025 ReviewForest ships print materials only inside Germany, Austria and Switzerland, but you can print the files at any local shop you trust. As of Februrary 2025, ReviewForest no longer ships print materials outside of Germany, Austria, and Switzerland. We’ve made this change to provide you with more flexibility and local printing options. Hey there! 👋 While our review forest features are available worldwide, we currently ship print materials only to Germany, Austria, and Switzerland. But don’t worry - you can still get your materials printed locally! ## What This Means for You outside Germany, Austria or Switzerland: [Section titled “What This Means for You outside Germany, Austria or Switzerland:”](#what-this-means-for-you-outside-germany-austria-or-switzerland) * Full access to all ReviewForest features and digital materials * Freedom to work with local print shops you trust * No minimum order restrictions * Reduced carbon footprint from shorter shipping distances ## How to Get Your Materials Printed: [Section titled “How to Get Your Materials Printed:”](#how-to-get-your-materials-printed) 1. Download your print files directly from ReviewForest 2. Choose a local print shop in your area 3. Get exactly the quantity you need We’re currently maintaining direct shipping only to Germany, Austria, and Switzerland, while empowering customers worldwide to support their local printing businesses. # Other Topics > GDPR compliance, team access, and other useful information. [GDPR & Your Customers' Reviews on ReviewForest: All You Need to Know ](/miscellaneous/gdpr-your-customers-reviews-on-reviewforest-all-you-need-to-know/)ReviewForest is fully GDPR compliant and you don't need extra consent to display customer reviews. [Order processing contract ](/miscellaneous/order-processing-contract/)Get a signed data processing agreement (DPA) from ReviewForest by email. [Team Access: How to add team members and share access ](/miscellaneous/team-access-how-to-add-team-members-and-share-access/)Invite up to three teammates to your ReviewForest account, set manager or member roles, transfer ownership, or remove access when someone leaves the team. # GDPR & Your Customers' Reviews on ReviewForest: All You Need to Know > ReviewForest is fully GDPR compliant and you don't need extra consent to display customer reviews — the reviewer already agreed when posting on Google. 1. **Introduction** A common question is if and how ReviewForest is compliant with GDPR. The short answer is ReviewForest is fully GDPR compliant. Let’s look at it in detail. While we have several GDPR-relevant topics surrounding ReviewForest—like our [Website Widgets](/widgets/widgets-gdpr/) and the process of Asking for Reviews—in this article, we’ll delve deep into a frequently posed question: **Do companies using ReviewForest need explicit customer consent to display their names on the review forest page and plant trees for their reviews?** The short answer is: no, you don’t need their consent. 2. **Review Platforms and Public Sharing: A User’s Choice** An important thing to highlight is that users can only leave a review on Google if they have a Google account. When creating this account, they agree to Google’s privacy policy, which sets clear terms about data sharing and usage. As such, the process of review submission is built upon prior consent. In this context, companies can’t even collect additional consent. Why? Because the user directly interacts with review platforms like Google when they decide to post a review. They choose which data to share with Google, and it’s Google that explicitly informs the user about the public usage of their review and name. Moreover, Google also notifies users that their feedback may appear on third-party sites, like ReviewForest. ![Screenshot of the Google review modal showing the users chosen name and profile picture, rate with stars, and the note 'Posting publicly'](/images/articles/en/gdpr-your-customers-reviews-on-reviewforest-all-you-need-to-know-1.png) ![Expanded view of the Google review modal detailing the public nature of posts, indicating they can appear on various Google services and third-party sites like ReviewForest](/images/articles/en/gdpr-your-customers-reviews-on-reviewforest-all-you-need-to-know-2.png) The data control in this context isn’t between the company and the user. It’s squarely between the review platform (like Google) and the user leaving the review. Thus, businesses using ReviewForest don’t need to fret about GDPR consent; the user has already given it to the review platform. 3. **Optional: ReviewForest’s Proactive Approach to Privacy: Using Initials** Despite not needing to do this, some businesses have asked us to pseudonymize the reviewer’s name by using initials. We’re rolling out a feature soon that will display only the initials of reviewers. While not a GDPR requirement, we believe in the power of choice and flexibility. Again, this is purely optional and not a requirement. ![Coming soon: display only customers' initials](/images/articles/en/gdpr-your-customers-reviews-on-reviewforest-all-you-need-to-know-3.png) 4. **Empowering the User: Right to Opt-Out** Any user who wishes their name to be removed from our platform can reach out to us, and we’ll handle their request promptly. For a more comprehensive understanding of our commitment to user data, you’re always welcome to visit our detailed privacy policy. 5. **Conclusion** ReviewForest’s software aligns with GDPR guidelines. We’re here to bridge the gap between feedback and environmental impact, all while upholding the highest standards of data privacy and user respect. If you’re considering using ReviewForest’s widgets, we have an [article detailing how to ensure they’re implemented in a GDPR-compliant manner on your website](/widgets/widgets-gdpr/). # Order processing contract > Get a signed data processing agreement (DPA) from ReviewForest by email — a quick step that keeps your GDPR documentation complete and your legal team happy. In some cases, your company may wish to enter into a processing agreement with us to comply with data protection requirements. Please drop us a line at so we can send you a copy. # Team Access: How to add team members and share access > Invite up to three teammates to your ReviewForest account, set manager or member roles, transfer ownership, or remove access when someone leaves the team. You can invite up to 3 people to manage your [ReviewForest account](https://app.reviewforest.org/signin) and give them access to features within your account. This article will give you an overview of the different roles and the access rights each role has when accessing your ReviewForest account. Further down you find instructions on how to invite members & remove members from your account as well as how to transfer your manager role to another team member. ![](/images/articles/en/team-access-how-to-add-team-members-and-share-access-1.png) At the end of the article you will find instructions on how to invite team members to your account, transfer the manager role to another team member, or remove a team member from your ReviewForest account. ### Examples & Use-cases [Section titled “Examples & Use-cases”](#examples--use-cases) There are many reasons why you might want to share the access to your ReviewForest account with your team members or agencies that support your business in its work. You may want to give a marketing agency access to your ReviewForest account so they can use your social media templates or ReviewForest brand package and planting project content to tell people about your green initiative. You may also want to share access with your accounting team so they can access your invoices and invoice breakdowns. Or you may want to use our Public API and put the access in the hands of your developers. To take full advantage of the team access function, it’s important to know the terms and access rights! ### Manager and member access [Section titled “Manager and member access”](#manager-and-member-access) The term “Manager” refers to the person who originally registered with ReviewForest. Our system has assigned all available rights to this person, who is identified by his or her login email address. The term “Members” refers to anyone who has been invited (by the “Manager”) to access your company’s ReviewForest account. It is important to note that Managers and Members have slightly different access rights. ### Access Rights [Section titled “Access Rights”](#access-rights) The following table provides an overview of all possible functions of your ReviewForest account. An “x” indicates that these functions are only available to the person with the manager role. ![](/images/articles/en/team-access-how-to-add-team-members-and-share-access-2.png) ## If you have questions or suggestions, let us know! Find the description of how to use the team access feature below. [Section titled “If you have questions or suggestions, let us know! Find the description of how to use the team access feature below.”](#if-you-have-questions-or-suggestions-let-us-knowfind-the-description-of-how-to-use-the-team-access-feature-below) ![](/images/articles/en/team-access-how-to-add-team-members-and-share-access-3.png) You can invite up to 3 members to access your ReviewForest account and the features within. You find the feature within your “Account settings” (top right corner) ![](/images/articles/en/team-access-how-to-add-team-members-and-share-access-4.png) 1. go to “Team members” & press “+Add” 2. enter the email addresses of the team members you want to invite 3. click on “Send” in order to send the invitations to your new members email address Your team members will get an invitation email. They need to follow the link within the email. This will lead them to the sign-in page, where they set a password or sign-in with Google. Note: sign-in with Google is only possible if the email address with which you invited them matches their Google email address. ## We will save the login credentials of your team members, so they can login every time they need to access features of your ReviewForest account. [Section titled “We will save the login credentials of your team members, so they can login every time they need to access features of your ReviewForest account.”](#we-will-save-the-login-credentials-of-your-team-members-so-they-can-login-every-time-they-need-to-access-features-of-your-reviewforest-account) ![](/images/articles/en/team-access-how-to-add-team-members-and-share-access-5.png) You may want to exclude members from accessing your ReviewForest account. This may be the case if a team member leaves your company or you need another seat to invite another member to your ReviewForest account. Here is how you do it: 1. go to “Team members” 2. see the email address of the member you want to exclude from accessing your ReviewForest account 3. click on the “Remove” icon 4. please confirm your choice to remove the team member ![](/images/articles/en/team-access-how-to-add-team-members-and-share-access-6.png) ## We will confirm the successful removal. From this time onward, your former team member wont be able to login to your ReviewForest account. If you already had 3 team members added to your account, you can now invite another team member. [Section titled “We will confirm the successful removal. From this time onward, your former team member wont be able to login to your ReviewForest account. If you already had 3 team members added to your account, you can now invite another team member.”](#we-will-confirm-the-successful-removal-from-this-time-onward-your-former-team-member-wont-be-able-to-login-to-your-reviewforest-accountif-you-already-had-3-team-members-added-to-your-account-you-can-now-invite-another-team-member) ![](/images/articles/en/team-access-how-to-add-team-members-and-share-access-7.png) We assigned the manager role to the person who initially signed up with ReviewForest. This person might not be a manger in your company. If you want to transfer the manger role within your ReviewForest account to another person, be that a manger in your company or another team member, you can do so with this function. It also comes in handy if you are the manager of the ReviewForest account and you yourself are leaving the company and want to transfer all relevant rights to another team member. Note: you can only transfer the manager right to an already invited team member of your ReviewForest account. How to: 1. go to “Team members” 2. find the team members email address you want to transfer your manager right to 3. click on the “Make manager” icon and confirm your choice You and the new manager to be get an email confirmation. From now on you will have the status of a team member within the ReviewForest account and the new manager can access the rights to adding members, excluding members and transferring the manger role. # Review Forest & Tree Planting > Manage your review forest, planted trees, and review settings. [How to Plant Trees for Previous Reviews ](/review-forest-tree-planting/how-to-plant-trees-for-previous-reviews/)Joined ReviewForest recently? You can plant trees for reviews you collected before signing up. Here is how to reward past customers in just a few clicks. [How to change the link (URL) of your review forest ](/review-forest-tree-planting/how-to-change-the-link-url-of-your-review-forest/)Change the slug of your review forest URL in just a few clicks. Read this first though, because your old link stops working the moment you save it. [How to Add Tree Certificates to Your Review Forest Page ](/review-forest-tree-planting/how-to-add-tree-certificates-to-your-review-forest-page/)Let customers download their tree certificate straight from your forest page. Flip on one setting and every reviewer gets proof of their planted tree. [How to Turn the Tree Age Display On or Off ](/review-forest-tree-planting/how-to-turn-the-tree-age-display-on-or-off/)Tired of all your trees looking the same age? Toggle tree age display on to show saplings growing into full trees, or turn it off for adult trees only. [Setting Your Tree Planting Limit ](/review-forest-tree-planting/setting-your-tree-planting-limit/)Cap your total tree planting budget in ReviewForest with a one-time limit. Learn how to adjust it, what happens when you hit it, and which options exist. [Branching Out: Adding Another Review Forest to Your Account ](/review-forest-tree-planting/branching-out-adding-another-review-forest-to-your-account/)Expanding your ReviewForest impact is straightforward. Here is how to add another review forest for a new location, product, or brand under one account. [Brandforest - Showcase All Your Reviews ](/review-forest-tree-planting/brandforest-showcase-all-your-reviews/)Running multiple locations or products? The Brandforest pulls every review into one hub, with a carousel widget and combined tree-planting impact. [Which Reviews Lead to Planting Trees? ](/review-forest-tree-planting/which-reviews-lead-to-planting-trees/)Every review plants a tree, no matter which platform it came from or how the reviewer got there. Here is why ReviewForest counts them all, fairly and simply. [How to Change Your Google Review Link ](/review-forest-tree-planting/how-to-change-your-google-review-link/)Change your review forest's Google review link manually. Useful for nested locations (school inside an academy, practice inside a medical center) where the default link does not open the review form. # Branching Out: Adding Another Review Forest to Your Account > Expanding your ReviewForest impact is straightforward. Here is how to add another review forest for a new location, product, or brand under one account. ### Introduction: [Section titled “Introduction:”](#introduction) Expanding your environmental impact and customer engagement through ReviewForest is straightforward. If you’re managing different locations, like McDonald’s Berlin and McDonald’s Frankfurt, and want to create a separate review forest for each, this guide is for you. ### Key Points to Remember: [Section titled “Key Points to Remember:”](#key-points-to-remember) * **New Forest, New Charges:** Each new review forest for a different location or product is treated as a separate entity and will incur its own charges. * **Tree Planting Projects:** While setting up each forest, you have the option to select different or the same tree planting projects for each one. * **Unique Links for Each Forest:** Create individual links for different locations or products, such as reviewforest.org/mcdonalds-berlin or reviewforest.org/mcdonalds-frankfurt. * **The Company Forest Option:** If you prefer to aggregate all your trees and reviews in one large forest, consider using the Company Forest feature. * **Adding Review Profiles for the Same Business or Product:** To gather reviews from multiple platforms (like Google and Facebook) for the same business or product, simply connect these platforms to the relevant forest instead of creating a new one. * **Unified Billing Details:** All forests under one account share the same billing information. Different billing addresses or payment methods require setting up a new account with a different email. ### Step-by-Step Guide to Add a New Review Forest: [Section titled “Step-by-Step Guide to Add a New Review Forest:”](#step-by-step-guide-to-add-a-new-review-forest) 1. Navigate to your [Review Forests Overview](https://app.reviewforest.org/review-forests). 2. Click on *+ New review forest* to start the process. ![New Review Forest Creation](/images/articles/en/branching-out-adding-another-review-forest-to-your-account-1.png) 3. Follow the setup steps, similar to how you created your first review forest. ![Setup Process](/images/articles/en/branching-out-adding-another-review-forest-to-your-account-2.png) **Conclusion:**\ Growing more than one review forest is easy. Should you need any assistance or have further inquiries, feel free to reach out to our support team. We’re here to help your forests flourish! # Brandforest - Showcase All Your Reviews > Running multiple locations or products? The Brandforest pulls every review into one hub, with a carousel widget and combined tree-planting impact. Your business has multiple locations or products? Great! Here’s how ReviewForest’s Brandforest helps you make the most of all your reviews in one place. ## What’s a Brandforest? [Section titled “What’s a Brandforest?”](#whats-a-brandforest) Think of it as your review headquarters – one central place where customers can see reviews for all your business locations or products. Instead of managing separate review pages, your Brand forest brings everything together beautifully. ![](/images/articles/en/brandforest-showcase-all-your-reviews-1.jpg) ## Why Your Business Needs a Brandforest [Section titled “Why Your Business Needs a Brandforest”](#why-your-business-needs-a-brandforest) **1. Show the Full Picture** Instead of sharing reviews location by location, give your customers the complete view of your business’s success. The Brandforest combines all your review forests, making your total impact more impressive. ![](/images/articles/en/brandforest-showcase-all-your-reviews-2.jpg) **2. A central place for your request for reviews** \*\*\*\*Enable your customers to review you on different platforms! ![](/images/articles/en/brandforest-showcase-all-your-reviews-3.jpg) **3. One Widget, All Reviews** Our carousel widget is a game-changer. It displays reviews from all your locations or products in one sleek display. Imagine: Your website visitors can see great feedback from across your entire business – whether it’s from your downtown store, online shop, or service locations. ![](/images/articles/en/brandforest-showcase-all-your-reviews-4.jpg) **4. Environmental Impact at Scale** Every review plants a real tree. With a Brandforest, you can showcase your total environmental impact across all locations. It’s not just about reviews – it’s about showing how your entire business contributes to sustainability. ## Getting Started [Section titled “Getting Started”](#getting-started) The Brandforest comes with our Professional plan, designed for growing businesses: * One central hub for all reviews * The dynamic carousel widget showcases ALL of your reviews on your website * Combined tree-planting impact * Selling products? Add unlimited products with one Professional plan ## Getting Access [Section titled “Getting Access”](#getting-access) When you have > 2 locations or products and your subscription is running on Professional Plan, you’ll get the access to the Brandforest via a banner inside “Review forests” ![](/images/articles/en/brandforest-showcase-all-your-reviews-5.jpg) ## Questions? Let’s Talk [Section titled “Questions? Let’s Talk”](#questions-lets-talk) Whether you’re running multiple locations, launching new products, or just exploring your options – we’re here to help. Every business is unique, and we’ll find a solution that works for you. [Book a quick chat](https://de.reviewforest.org/company/book-a-meeting) or drop us a line at Want to see it in action? Check out our [Brandforest Demo-Page](https://reviewforest.org/demo-brand?lang=en) # How to Add Tree Certificates to Your Review Forest Page > Let customers download their tree certificate straight from your forest page. Flip on one setting and every reviewer gets proof of their planted tree. ## To enable your customers to download their tree certificate, you can make a setting for your forest page [Section titled “To enable your customers to download their tree certificate, you can make a setting for your forest page”](#to-enable-your-customers-to-download-their-tree-certificate-you-can-make-a-setting-for-your-forest-page) It’s the easiest way to provide your customers with their certificates. Simply inform your customers that after publishing their review, they need to return to your review forest to receive their certificate. ### The certificate is displayed by clicking on the tree and is ready for download. [Section titled “The certificate is displayed by clicking on the tree and is ready for download.”](#the-certificate-is-displayed-by-clicking-on-the-tree-and-is-ready-for-download) ![](/images/articles/en/how-to-add-tree-certificates-to-your-review-forest-page-1.jpg) We have already added another FAQ section to each review forest to help you with communication. ![](/images/articles/en/how-to-add-tree-certificates-to-your-review-forest-page-2.jpg) ## How to Allow Tree Certificate Downloads in Your Review Forest [Section titled “How to Allow Tree Certificate Downloads in Your Review Forest”](#how-to-allow-tree-certificate-downloads-in-your-review-forest) 1. First, log into your ReviewForest member area and go to “Review forests”: 2. Click on the “Manage” button 3. …and select the option “Manage display settings” ![](/images/articles/en/how-to-add-tree-certificates-to-your-review-forest-page-3.jpg) 4. Scroll down to “Allow downloading tree certificates” and confirm your selection by clicking on the symbol. The symbol should now be displayed in blue. 5. Save your selection via “Save changes” ![](/images/articles/en/how-to-add-tree-certificates-to-your-review-forest-page-4.jpg) # How to change the link (URL) of your review forest > Change the slug of your review forest URL in just a few clicks. Read this first though, because your old link stops working the moment you save it. ## How to change the URL of your review forest [Section titled “How to change the URL of your review forest”](#how-to-change-the-url-of-your-review-forest) Each review forest at ReviewForest has a unique link. The technical term for these links is URL. You share this URL with your customers so they can find your review forest and leave reviews. A typical ReviewForest URL looks like this: `https://reviewforest.org/your-business` The part after “reviewforest.org/” is customizable and is often referred to as the “slug”. In this example, “your-business” would be the slug. ## How to change the URL: [Section titled “How to change the URL:”](#how-to-change-the-url) 1. Go to [Review forests](https://app.reviewforest.org/review-forests) in your ReviewForest Dashboard ![](/images/articles/en/how-to-change-the-link-url-of-your-review-forest-1.png) 2. Find the review forest whose URL you want to change 3. Click on “Manage” next to the desired review forest 4. Select “Change Name & URL” from the dropdown menu 5. In the window that opens, you’ll find the “Forest URL” field ![](/images/articles/en/how-to-change-the-link-url-of-your-review-forest-2.png) 6. Change the part of the URL after “” When changing the URL, you should keep a few things in mind: * Use only lowercase letters, numbers, and hyphens * No special characters or spaces allowed * Maximum of 18 characters after the slash * The shorter and more memorable, the better Important Before changing the URL, please carefully read the following consequences: * Your previous link to your review forest will no longer work. * Customers who have the current link will not be able to find your review forest. * You must update the following materials: All printed templates (e.g., business cards, flyers) must be reprinted. Already used digital templates must be manually replaced. Your ReviewForest email signature must be updated. QR codes that refer to your review forest must be recreated. * All external links (e.g., on your website or social media) must be adjusted. This only affects manual links. The widgets update themselves automatically. ## Tips for a good URL: [Section titled “Tips for a good URL:”](#tips-for-a-good-url) * Use your company name or an abbreviation of it * Keep it short and easy to remember * Avoid complicated or long words Example: Instead of: Better: Tip With a well-chosen URL, you make it easier for your customers to leave reviews and find your forest! A short, memorable URL is particularly important when customers need to enter it on their mobile phones. The simpler, the better! # How to change the name of your review forest > How to change the company or product name of your review forest in just a few clicks, without your existing link (URL) losing its validity. Would you like to change the company or product name of your review forest? Then you’re in the right place. If instead you’d like to change the company name in your billing address, please take a look at this article: [Change billing address](/subscription-invoices/how-to-change-your-billing-address/) ![In this article you'll learn how to change this name](/images/articles/de/so-andert-man-den-namen-des-bewertungswaldes-1.png) * Navigate to the [review forest overview](https://app.reviewforest.org/review-forests) * First click on *Manage* and then on *Change name & URL* * Enter the new name and click on *Save* ![](/images/articles/de/so-andert-man-den-namen-des-bewertungswaldes-2.png) ![](/images/articles/de/so-andert-man-den-namen-des-bewertungswaldes-3.png) Important If you change not only the name but also the URL (link), the old link to your review forest will no longer work. This is a problem if, for example, you’ve already printed the link or used it in email signatures. However, if you only change the name, it’s not a problem. # How to Change Your Google Review Link > Change the Google review link on your review forest manually, in case the automatic link does not work or you need a custom one. ## When do you need this? [Section titled “When do you need this?”](#when-do-you-need-this) In most cases the automatic Google review link works without any change. You only need this guide if one of the following applies to you: * **Nested location**: Your business is housed inside another building or institution (for example a school inside an academy, a practice inside a medical center, a stand on a campus). In these cases Google sometimes does not recognize the location independently, and the default review link does not open the review form. * **The “Write a review” button does not work**: If you or test customers click the review button on your review forest and nothing happens, that is a typical sign of this exact issue. * **You want to use a custom Google review link for other reasons**. Caution This guide is only for changing the review link behind the review button on your review forest. If you want to connect your review forest to a different Google Business Profile, please see this article: [How to change the Google Business Profile linked to your review forest](/integrations/how-to-change-the-google-business-profile-linked-to-your-review-forest/). ## Which link format is accepted? [Section titled “Which link format is accepted?”](#which-link-format-is-accepted) ReviewForest accepts **only** the short link that Google itself generates, in the format: ```plaintext https://g.page/r/YOUR-BUSINESS-ID/review ``` Other links (for example a Google search URL or a Google Maps URL) are rejected when you try to save. The `g.page` short link is only available to you if you can access the Google Business Profile as an admin. ## Step-by-step [Section titled “Step-by-step”](#step-by-step) 1. **Sign in**: Log in to your ReviewForest account and go to [Review forests](https://app.reviewforest.org/review-forests). 2. **Open the review forest settings**: Pick the relevant review forest, click “More Features” > “Change Google review link”. 3. **Get the review link from Google**: * Open Google in a new browser tab * Search for your business * Make sure you are signed in as an admin of your Google Business Profile * Click “Ask for reviews” * Google shows you a short link in the format `https://g.page/r/.../review` 4. **Copy the link**: Copy the review link Google displays. Important: it must be the `g.page/r/.../review` link, no other format works. 5. **Paste and save**: * Switch back to your ReviewForest account * Paste the Google review link into the input field * Confirm the change Test with a different browser account To verify the change, open your review forest in a browser that is signed in with a **different** Google account (one that is not an admin of the Business Profile). Otherwise Google will not show the review form, because you cannot leave a review for your own business. ## What if I do not have admin access to the Business Profile? [Section titled “What if I do not have admin access to the Business Profile?”](#what-if-i-do-not-have-admin-access-to-the-business-profile) Google only generates the `g.page` short link for admins of the respective Google Business Profile. If your location is run under a third-party host (an academy, a university, a shared coworking space), you have two options: 1. **Request co-management from the host**: The host organization can add you as an additional owner of the Business Profile. Once you have admin access, you can generate the link yourself. 2. **Ask the host for the link**: If co-management is not possible, ask the host to send you the `g.page/r/.../review` link from their Business Profile. ## Need help? [Section titled “Need help?”](#need-help) If you have questions or need assistance, please reach out to our support. We are happy to help. # How to leave a review on ReviewForest Direct > Here's how to leave a review through ReviewForest Direct in just a few steps, receive your tree certificate, and plant a real tree at the same time. With ReviewForest, leaving a review for a business is just as easy as on any other review platform — and even easier than that! ## The steps are simple [Section titled “The steps are simple”](#the-steps-are-simple) 1. Open the review forest of the business you want to review (reviewforest.org/the-business-name) 2. Click the “Review now” button ![](/images/articles/de/so-gibts-du-eine-bewertung-auf-reviewforest-direct-ab-1.jpg) ## The review form now opens [Section titled “The review form now opens”](#the-review-form-now-opens) The first step asks for the star rating — your overall rating. ![](/images/articles/de/so-gibts-du-eine-bewertung-auf-reviewforest-direct-ab-2.jpg) ## The star rating alone is already enough [Section titled “The star rating alone is already enough”](#the-star-rating-alone-is-already-enough) If you’d like, you can also give more detailed feedback and share your experiences. ![](/images/articles/de/so-gibts-du-eine-bewertung-auf-reviewforest-direct-ab-3.jpg) ## Show yourself as the author of your review [Section titled “Show yourself as the author of your review”](#show-yourself-as-the-author-of-your-review) Choose whether you’d like to ***show your name*** and ***receive a tree certificate*** ![](/images/articles/de/so-gibts-du-eine-bewertung-auf-reviewforest-direct-ab-4.png) …or whether you’d rather stay anonymous. Reviews submitted without a name are shown as anonymous author. ![](/images/articles/de/so-gibts-du-eine-bewertung-auf-reviewforest-direct-ab-5.jpg) ## Enter your email address [Section titled “Enter your email address”](#enter-your-email-address) We only need your email address to verify that the review is a “human-made” one and, if applicable, to send you your tree certificate. In individual cases, it may be necessary to share your email address with the business that was reviewed. ## Confirm your email address and plant a tree [Section titled “Confirm your email address and plant a tree”](#confirm-your-email-address-and-plant-a-tree) Check your email inbox for the verification email. By clicking the “Verify and plant a tree” button, you complete the review process and can view your review in the business’s review forest. If you chose to receive a tree certificate, we’ll now send you one by email. ### Behind the scenes [Section titled “Behind the scenes”](#behind-the-scenes) Behind the scenes, once a month we invoice the business for all the trees and send the funds to the respective planting project, which then plants the trees on the ground — including your tree. # How to Manage Your Review Platforms (Add, Delete, Reorder...) > Add, delete, pin, or reorder review platforms in your review forest. Complete guide for the Premium and Professional plans. \*\*You have several options for managing the review platforms connected to your review forest. \*\* * You can add more platforms * You can delete existing connections to review platform(s) * You can “pin” one of the review platforms to display it at the very top as a review option * You can set the order of the platforms Note: these features are only available on the Premium and Professional plans. !['Review forests'](/images/articles/de/so-verwaltest-du-deine-bewertungsplattformen-hinzufugen-loschen-anordnen-1.png) ### You’ll find all of these features in your member area under “Review forests” [Section titled “You’ll find all of these features in your member area under “Review forests””](#youll-find-all-of-these-features-in-your-member-area-under-review-forests) 1. Go to “Review forests” 2. Navigate to the review forest that is already connected to multiple platforms, or that you’d like to connect 3. Click “Manage” 4. In the menu that opens, click “Manage review platforms” !['Manage review platforms'](/images/articles/de/so-verwaltest-du-deine-bewertungsplattformen-hinzufugen-loschen-anordnen-2.png) ## 1 Add more review platforms to your review forest [Section titled “1 Add more review platforms to your review forest”](#1-add-more-review-platforms-to-your-review-forest) * First, follow steps 1 - 4 * Click “+Connect more” to add additional platforms. The remaining options will be shown to you. * From the review platforms displayed, select the one you’d like to connect. * Complete the connection by following the on-screen instructions !['Add review platform'](/images/articles/de/so-verwaltest-du-deine-bewertungsplattformen-hinzufugen-loschen-anordnen-3.png) ## 2 Delete existing connections to review platform(s) [Section titled “2 Delete existing connections to review platform(s)”](#2-delete-existing-connections-to-review-platforms) * First, follow steps 1 - 4 * Navigate to the review platform you’d like to disconnect from your review forest. You’ll find an icon next to the platform’s name. * Click the “Disconnect platform” icon. * Confirm the details in the info window that opens and confirm the “disconnection” !['Disconnect review platform'](/images/articles/de/so-verwaltest-du-deine-bewertungsplattformen-hinzufugen-loschen-anordnen-4.png) ## 3 “Pin” review platforms & display them at the very top as a review option [Section titled “3 “Pin” review platforms & display them at the very top as a review option”](#3-pin-review-platforms--display-them-at-the-very-top-as-a-review-option) To guide your customers toward reviewing you on your preferred review platform, you can “pin” the relevant review platform in your review forest. This displays that review platform at the very top of the list of options for reviewing you. * First, follow steps 1 - 4 * Click the pin icon in front of the name of the review platform you’d like to display at the very top. On the right side, you’ll see how your setting will appear to your customers on your review forest page once they click the “Review now” button. !['Pin review platform to the top'](/images/articles/de/so-verwaltest-du-deine-bewertungsplattformen-hinzufugen-loschen-anordnen-5.png) ## 4 Change the order of the platforms [Section titled “4 Change the order of the platforms”](#4-change-the-order-of-the-platforms) You can change the order of your connected platforms. * First, follow steps 1 - 4 * Click the dots in front of the review platform you want to move. * Hold the mouse button down and drag the platform up (or down). On the right side, you’ll see how your setting will appear to your customers on your review forest page once they click the “Review now” button. !['Change the order'](/images/articles/de/so-verwaltest-du-deine-bewertungsplattformen-hinzufugen-loschen-anordnen-6.png) # How to plant additional trees > Plant additional trees independently of reviews, for example for anniversaries, employees, or marketing. Includes a tree certificate and a free tree count. Every tree contributes to a greener future. With ReviewForest, you can plant trees not only through reviews but also for special occasions. Perfect for marketing campaigns like “A tree for every sale,” as a corporate anniversary gift, or for reviews on platforms without a direct ReviewForest integration. With the “Additional trees” feature, you can plant trees individually and flexibly. For every tree, you receive a tree certificate that you can download in the “Trees” section – a wonderful way to bring someone joy! And of course, the tree is also displayed in your review forest. ## Step by step: Planting additional trees [Section titled “Step by step: Planting additional trees”](#step-by-step-planting-additional-trees) **Step 1: Select a review forest** Go to *Review forests*, choose the forest you want, and click *Plant more trees* > *additional trees*. **Step 2: Set the number of trees and the planting rhythm** Specify how many trees you want to plant and whether you want to do this once or on a recurring basis (e.g. monthly for each employee). ![](/images/articles/de/so-pflanzt-man-zusatzliche-baume-1.png) **Step 3: Define names and occasion** Here you can enter names and occasions for the tree planting. These are shown next to the tree in the review forest. Options for names: * Direct entry * Upload as Excel or CSV (*Import as file*) * Multiple upload * Enter later under *Trees* ![](/images/articles/de/so-pflanzt-man-zusatzliche-baume-2.png) The occasion appears in the detail view of the tree in your review forest ![](/images/articles/de/so-pflanzt-man-zusatzliche-baume-3.png) **Step 4: Download the tree certificate** Once a tree has been dedicated to a name, you can download the certificate in the *Trees* section. ![](/images/articles/de/so-pflanzt-man-zusatzliche-baume-4.png) Note Note: The tree certificate becomes available after the tree has been dedicated to someone. # How to Plant Trees for Previous Reviews > Joined ReviewForest recently? You can plant trees for reviews you collected before signing up. Here is how to reward past customers in just a few clicks. When you sign up for ReviewForest, you’ll plant a tree for all new reviews going forward. But what about the reviews you received before joining ReviewForest? You have a choice! You can plant trees for existing reviews at any time to thank your other customers for taking the time to write you a review. ### Here’s how to plant trees for existing reviews [Section titled “Here’s how to plant trees for existing reviews”](#heres-how-to-plant-trees-for-existing-reviews) 1. Go to [Review Forests ](https://app.reviewforest.org/review-forests)and click on *Plant more trees* ![](/images/articles/en/how-to-plant-trees-for-previous-reviews-1.jpg) 2. Select *For existing reviews*. 3. Confirm the costs that will be incurred in the final step. ![](/images/articles/en/how-to-plant-trees-for-previous-reviews-2.jpg) **If you’ve just signed up, it can take up to an hour before the old reviews are displayed in your review forest.** # How to Turn the Tree Age Display On or Off > Tired of all your trees looking the same age? Toggle tree age display on to show saplings growing into full trees, or turn it off for adult trees only. Have you ever wondered why all the trees in your review forest show the same age? An enthusiastic tree planter asked us this question. And lacking a good answer, our design and development team immediately got to work creating a “more realistic” display of tree ages. Even though the living trees on site are naturally planted as small saplings, the trees in your review forest previously showed the same age - namely, adult age. If you liked exactly this display, you can still set it for your forest! If you’re as excited about some variety as we are, your forest will now display different tree ages. ## We Distinguish 6 Different Ages and Count from Planting/Review Date [Section titled “We Distinguish 6 Different Ages and Count from Planting/Review Date”](#we-distinguish-6-different-ages-and-count-from-plantingreview-date) As soon as we capture a new review from you, your review forest displays another tree. With the new display, a small sapling is initially shown and over time the tree “grows”. You can see the individual ages and display forms in the illustration. ![](/images/articles/en/how-to-turn-the-tree-age-display-on-or-off-1.jpg) Since the update, the trees are displayed in your review forest according to their age. If you want to reverse this change and only display the adult ages of your trees, then simply follow the steps described below. ## How to Turn Tree Age Display On or Off [Section titled “How to Turn Tree Age Display On or Off”](#how-to-turn-tree-age-display-on-or-off) 1. First log into your ReviewForest member area and go to “Review forests”: 2. Click on the “Manage” button 3. … and select the “Manage display settings” option ![](/images/articles/en/how-to-turn-the-tree-age-display-on-or-off-2.jpg) 4. Scroll down to “Show tree age” and deselect it by clicking on the symbol. The symbol will be displayed in gray and the trees in your review forest will be displayed exclusively as fully grown trees. 5. Save your selection via “Save changes” ![](/images/articles/en/how-to-turn-the-tree-age-display-on-or-off-3.jpg) # How the tree certificates work > ReviewForest automatically generates a tree certificate as a PDF for every tree planted. Here's how to find the certificates and share them with your customers in the right way. ReviewForest automatically creates a certificate in PDF format for every tree planted. If you like, you can share these certificates with your customers. ## How your customers receive the certificate [Section titled “How your customers receive the certificate”](#how-your-customers-receive-the-certificate) **Tree certificates are **not** shared with customers automatically.** There are a couple of reasons for this: * Google and other review platforms don’t share enough data about reviewers to automatically match and send out the certificates. All you get is a name, which isn’t necessarily a real name. * In some cases, you may not want the reviewer to receive the tree certificate at all. Your customers can view their tree in your review forest themselves at any time. If you’d also like to send them the certificate, you’ll need to do this manually. To do so, try to match the name from the review platform, download the certificates, and email them to your customers. We kindly ask you to skip paper printouts and use the digital certificate instead. ### Sample email texts you can send to your customers [Section titled “Sample email texts you can send to your customers”](#sample-email-texts-you-can-send-to-your-customers) Email template ```text Dear [Customer name], We'd like to sincerely thank you for taking the time and effort to review us on [INSERT REVIEW PLATFORM]. As a small token of our gratitude, we've partnered with ReviewForest & [INSERT TREE-PLANTING ORGANIZATION] to plant a tree in your name, so that together we can help build a better environment. Attached you'll find a tree certificate confirming the planting. Using the QR code on the certificate, you can learn more about the project and see your tree in our digital review forest. Thank you for your trust in [Company name]. We look forward to supporting you in the future as well. Best regards, ``` ## How to find the certificates [Section titled “How to find the certificates”](#how-to-find-the-certificates) ![This is what a certificate looks like](/images/articles/de/so-funktionieren-die-baumzertifikate-1.png) 1. Go to [Trees](https://app.reviewforest.org/trees) ![](/images/articles/de/so-funktionieren-die-baumzertifikate-2.png) 2. Click the seedling icon to download the certificate. ![](/images/articles/de/so-funktionieren-die-baumzertifikate-3.png) 3. Alternatively, you can get the link to the tree by clicking the icon right next to it. The link to the tree in the review forest will then be copied to your clipboard. ![](/images/articles/de/so-funktionieren-die-baumzertifikate-4.png) The link then takes you to your review forest, with the tree highlighted: ![](/images/articles/de/so-funktionieren-die-baumzertifikate-5.png) By the way, this is the same link as the QR code on the certificate. ![This QR code also leads to the highlighted tree in your review forest](/images/articles/de/so-funktionieren-die-baumzertifikate-6.png) # Setting Your Tree Planting Limit > Cap your total tree planting budget in ReviewForest with a one-time limit. Learn how to adjust it, what happens when you hit it, and which options exist. Understanding your tree planting limit and its benefits can help you stay within your budget while making a positive impact. Here’s a comprehensive guide to help you navigate this feature: ## 1. Why Set a Tree Planting Limit? [Section titled “1. Why Set a Tree Planting Limit?”](#1-why-set-a-tree-planting-limit) * **Budget Management:** While our main goal is to help businesses plant as many trees as possible through reviews, we understand that some businesses have budget constraints. Setting a tree planting limit can help you manage your tree planting expenses effectively. * **Total Limit, Not Periodic:** This is a one-time limit, meaning if you set a limit of 500 trees, that’s the total number of trees you’ll plant irrespective of the time it takes. This isn’t a monthly or annual limit. ## 2. Navigating to Tree Planting Settings [Section titled “2. Navigating to Tree Planting Settings”](#2-navigating-to-tree-planting-settings) * **Starting Point:** Begin by clicking on the menu item [Review forests](https://app.reviewforest.org/review-forests). ![](/images/articles/en/setting-your-tree-planting-limit-1.png) * **Adjusting Your Limit:** Once inside, look for the option “Change planting settings.” This will open a modal where you can adjust your tree planting limits. ![](/images/articles/en/setting-your-tree-planting-limit-2.png) ## 3. What Happens When The Limit Is Reached? [Section titled “3. What Happens When The Limit Is Reached?”](#3-what-happens-when-the-limit-is-reached) * **Review Capture Stops:** Once your set limit is achieved, we won’t capture any new reviews for planting trees. * **Notification:** An email will be sent to you informing about the reached limit. * **Review Forest Deactivation:** Your review forest page will be deactivated and a prominent note will be displayed, stating that your company has ceased tree planting due to reaching the set limit. ## 4. About the Preset Limits [Section titled “4. About the Preset Limits”](#4-about-the-preset-limits) * **Preset Options:** Currently, you can select from our preset limits. These include options like 50, 100, 250, 500, and 1,000 trees. * **Custom Limit:** If your desired limit isn’t a preset option and you wish to plant more than 1,000 trees but less than unlimited, you can reach out to our customer service. They will help you set a custom limit. Note: We’re also working on updating the UI to allow users to set manual limits in the future. Remember, our goal at ReviewForest is to plant as many trees as possible and make the earth greener. If you have any more questions, feel free to reach out to our support team. Happy planting! # When will my new review appear? > New review not showing up in your review forest yet? Learn about possible reasons and how to manually search for new reviews with a single click. Has a customer left a review for your business and you can already see it on Google, Facebook, Trustpilot, or Amazon? But the new review isn’t showing up in your review forest yet? Note It can take up to 24 hours for new reviews to appear in your review forest. There are several possible reasons for this. 1. The review hasn’t fully loaded on the review platform yet. You and everyone else can already see it on Google & Co., but some final data is still being processed in the background. 2. The review has been temporarily hidden or even removed by the review platform. You may still be able to see it, but the platform has flagged it and is checking it for policy violations. 3. The review was submitted during a time window when the last update to your review forest page had just run or hadn’t run yet. If (1.) the review’s data is still incomplete, or (2.) the review platform is currently checking the review, we unfortunately have to wait until that process is finished. Only then can we capture the review and display it in your review forest. ### Review received at the “wrong” time? We now have a solution for that! [Section titled “Review received at the “wrong” time? We now have a solution for that!”](#review-received-at-the-wrong-time-we-now-have-a-solution-for-that) Tip Both you (after receiving a review) and your customers (after leaving a review) can now manually refresh the trees in your review forest! The new feature can be found directly in your review forest, below the trees. There is a button labelled “Search for new reviews”. Once clicked, we will start searching for new reviews across all review platforms you have connected to your forest. Within 5 minutes, we will capture any new reviews (that don’t fall under cases 1 or 2 above) and display them as a tree. Note You can spot new trees because they appear blinking beneath the existing trees that are already there. Note For the new feature, we are currently testing usage limits of 5 times per day on the Standard plan, 12 times per day on the Premium plan, and 24 times per day on the Professional plan. This means the feature can be used up to 5 times per day per review forest on the Standard plan. # Which Reviews Lead to Planting Trees? > Every review plants a tree, no matter which platform it came from or how the reviewer got there. Here is why ReviewForest counts them all, fairly and simply. Thanks to you and your customers’ feedback, we plant trees together, giving life to a real forest. Here, we clarify which reviews actually result in tree planting and why it works like this with us. ## 1. Capturing Reviews - This Is How We Do It [Section titled “1. Capturing Reviews - This Is How We Do It”](#1-capturing-reviews---this-is-how-we-do-it) * **Automatically:** We automatically scan for new reviews on the review platforms that you’ve linked with your review forest. For instance, our system checks daily on Google for new incoming reviews. * **Everything in Sight:** Every new review that comes in during your membership is registered, no matter where it originates from. ## 2. Every Review = One Tree [Section titled “2. Every Review = One Tree”](#2-every-review--one-tree) * **No Matter Where It’s From:** We plant a tree for every one of your reviews, whether the reviewer previously came across ReviewForest to the review platform or elsewhere. ## 3. Why We Count All Reviews [Section titled “3. Why We Count All Reviews”](#3-why-we-count-all-reviews) * **Technology and Data Privacy:** Accurately tracking the reviewer’s path to the review is technically impossible. For instance, Google doesn’t share where the reviewer came from. Also, personal data, like the real name, are not shared due to data protection reasons. * **Various Paths, Same Destination:** Even if we could technically do so, it would often be unclear whether someone was made aware of the tree-planting action through a review card, social media post, poster, etc., and then directly searched for your company name, leaving a review on Google & Co. * **In Compliance with Rules:** We adhere to the rules of review platforms like Google & Co. and also respect competition law. Favoring certain reviews would not only violate guidelines but also legal requirements, as such reviews would have to be marked accordingly. ## 4. Handling of Fake Reviews or Removed Reviews [Section titled “4. Handling of Fake Reviews or Removed Reviews”](#4-handling-of-fake-reviews-or-removed-reviews) * **Fair Together:** We practice Fair Play and that includes dealing consistently with fake reviews or reviews that violate applicable law. * **Cost Credit:** If a review was removed from the platform, just write to us! We will credit you the cost of the tree planting. * **Digital vs. Real Forest:** The tree in your digital forest will be removed, but the real tree? It continues to stand and do good for our planet. The credit will then be accredited through another planting by you. ## In Conclusion [Section titled “In Conclusion”](#in-conclusion) In short, **every review plants a tree.** Regardless of whether the reviewer came via the ReviewForest platform. In the ReviewForest community, it’s not just about planting trees *only* for the reviews that were triggered by our action. Rather, the focus is on us collectively doing something good for our environment and thereby everyone benefits – the business, the customers, the forests, and our Earth. # Subscription & Invoices > Manage your plan, billing, and invoices. [How can I connect with ReviewForest via Google ](/subscription-invoices/how-can-i-connect-with-reviewforest-via-google/)Sign up with Google two ways: pick your business through Google Search, or connect your Google Business Profile so we can pull in your reviews automatically. [How to Cancel Your ReviewForest Subscription ](/subscription-invoices/how-to-cancel-your-reviewforest-subscription/)Cancel your ReviewForest plan in five quick steps inside Billing & Plan, including what happens to your forest, widgets, and links once your subscription ends. [My forest has been deactivated, why? ](/subscription-invoices/my-forest-has-been-deactivated-why/)Three reasons your forest may show inactive: a reached planting limit, a manual pause, or an unpaid invoice. Here is how to spot the cause and reactivate it. [Reactivate your ReviewForest subscription ](/subscription-invoices/reactivate-your-reviewforest-subscription/)Get your review forest back in minutes. Just reach out by chat, email or phone and our team will reactivate your ReviewForest subscription for you. # How can I connect with ReviewForest via Google > Sign up with Google two ways: pick your business through Google Search, or connect your Google Business Profile so we can pull in your reviews automatically. ## Two options for the signup via Google [Section titled “Two options for the signup via Google”](#two-options-for-the-signup-via-google) If you want to sign up via Google there are two options. Both of them will be shown to you during the registration process at step four. Here you can choose if you either want (1) to use the Google Search mask or if you want (2) to connect your Google My Business Account to us. ![Two options for signup via Google](/images/articles/en/how-can-i-connect-with-reviewforest-via-google-1.png) Either way, after registration we will use the established connection to automatically count your businesses reviews on Google in order to show them on your ReviewForest Prepage, your Social Media Templates and Marketing Material. Note If you are unable to find your business during the registration process using option (1) this is probably because your business has no physical address or your address is not publicly visible on Google. You can easily test whether this is the case for your company by entering the company’s address under the following link. If you find your company there, you can also find and register with ReviewForest by entering the same information. Tip [Google’s Place ID Finder](https://developers.google.com/places/web-service/place-id) **How to make your address public** * Login to your [Google My Business account](https://business.google.com/) * Visit the *Info* tab in the left menu * Click the pen icon to add your address next to the location symbol (below your company name) **Alternative - use option (2)** If you don’t want to make your businesses address public, you can use option (2) and connect your Google My Business account with us to advance the signup process. Please note that using this option there will pop up a window during the signup process and ask you if you are ready to give ReviewForest access to your Google My Business account in order to count existing and new reviews and implement them in your review forest. Sadly we can’t change the message or the extend of the access since it is a generic procedure created by Google. # How to Cancel Your ReviewForest Subscription > Cancel your ReviewForest plan. Standard plans cancel from Billing & Plan, Grandfather plan customers cancel by deactivating their review forest. Considering taking a break from ReviewForest? We’re always here to address any concerns, missing features, or issues you might encounter. Our virtual door is open, and we’re ready to assist before you make your decision. No hard feelings, either way. On the Grandfather plan? If your invoices say “Grandfather plan”, you’re one of our earliest customers. There is **no** cancel link in Billing & Plan for you. To cancel, simply deactivate your review forest. Jump to [How to deactivate your review forest (Grandfather plan)](#how-to-deactivate-your-review-forest-grandfather-plan). Caution When you cancel your subscription, it takes effect immediately, and there are no refunds. Here’s a simple and straightforward guide to cancel your subscription: ### How to cancel your subscription (standard plan) [Section titled “How to cancel your subscription (standard plan)”](#how-to-cancel-your-subscription-standard-plan) 1. **Step into the Clearing**: Go to [Billing & Plan](https://app.reviewforest.org/settings/invoices) to access your billing settings. 2. **Spot the Exit Sign**: At the bottom right, you’ll see a link saying “I want to cancel my subscription”. Please click on it. Don’t see this link? You’re most likely on the Grandfather plan. Follow the steps in [How to deactivate your review forest (Grandfather plan)](#how-to-deactivate-your-review-forest-grandfather-plan) instead. ![](/images/articles/en/how-to-cancel-your-reviewforest-subscription-1.png) 3. **Give us Some Feedback**: Share your reason for leaving, if possible. Your feedback is invaluable for our growth, though it’s optional. 4. **Tread Carefully and Be Informed**: Before you cancel, please be aware of the following: * Your review forest(s) will be deactivated, and customers won’t be able to submit reviews. * You must stop using the ReviewForest templates, name, or logo for your business. * Remove any mentions of your business’s association with ReviewForest from social media or blogs. * Manually remove any ReviewForest widgets and links from your setup. 5. **The Final Step**: After considering the above, you can cancel your subscription. For trial users, there’s no cost involved. For subscribers, the service continues until the end of the billing period without additional charges. ### How to deactivate your review forest (Grandfather plan) [Section titled “How to deactivate your review forest (Grandfather plan)”](#how-to-deactivate-your-review-forest-grandfather-plan) If your invoices say “Grandfather plan”, you signed up in our earliest days. Back then we charged simply: one review equals one tree, and only the cost of planting that tree was billed. Many features have been added since and we have introduced regular base plans, but your Grandfather plan stayed unchanged. **Cancelling for you is one click:** you deactivate your review forest, and your subscription ends together with it. There is no separate “Cancel” link in Billing & Plan for Grandfather customers. 1. Go to [Review forests](https://app.reviewforest.org/review-forests) and pick the forest you want to deactivate. 2. Click **“Manage”** and then **“Deactivate review forest”**. Your forest is now deactivated. If you have multiple forests, repeat the step for each one. Once all forests are deactivated, your subscription ends in full. No more trees will be planted and no further invoices will be issued. Important before you deactivate **Reactivating later does not bring you back to the Grandfather plan.** We cannot technically restore that plan. If you reactivate the forest after deactivation, you will be moved onto our current standard plan. If you only want to pause briefly or aren’t sure, please talk to us first. If you also want your data deleted (including the deactivated forests), please contact us via chat or email. # How to change the billing email address > Send your ReviewForest invoices to a different email address: open Payment & Plan, click Change, and enter the new email address. Our system automatically sends new invoices as email attachments to the email address on your account. If you’d like invoices to go to a different address, you can change it at any time. We call it the *billing email address*. Here’s how: 1. Log in and go to [*Payment & Plan*](https://app.reviewforest.org/settings/invoices) 2. Under *Billing details*, click *Edit* 3. Enter the email address you want invoices sent to in the *Email address to send invoices to* field, then click *Save changes*. ![Edit billing information dialog with the invoice email field](/images/articles/en/how-to-change-the-billing-email-address-1.png) # How to change your billing address at ReviewForest > How to update your ReviewForest billing address: Go to Payment & Plan, click Edit under Billing details, and save the new address. Would you like to change your company name or your company’s billing address? * Go to [Payment & Plan](https://app.reviewforest.org/settings/invoices) * Under **Billing details**, click *Edit* * Enter the new address or the new company name and click *Save* ![Billing details in your ReviewForest account settings](/images/articles/en/how-to-change-your-billing-address-1.png) If you’d like to change the company name on your review forest, please take a look at this article: [How to change the name of your review forest](/review-forest-tree-planting/how-to-change-the-name-of-your-review-forest/) # My forest has been deactivated, why? > Three reasons your forest may show inactive: a reached planting limit, a manual pause, or an unpaid invoice. Here is how to spot the cause and reactivate it. ## My forest has been deactivated, why? [Section titled “My forest has been deactivated, why?”](#my-forest-has-been-deactivated-why) If you notice that one or all of your forests have been deactivated without any action on your part, you will find an overview of the possible reasons and how you can reactivate your forests here. ## There are 3 possible causes to one or all of your forest page(s) showing “inactive” [Section titled “There are 3 possible causes to one or all of your forest page(s) showing “inactive””](#there-are-3-possible-causes-to-one-or-all-of-your-forest-pages-showing-inactive) You have reached the planting limit for your forest You or one of your team members manually deactivated your forest or your subscription You have outstanding invoices ## How to find out the relevant cause? - and fix it? [Section titled “How to find out the relevant cause? - and fix it?”](#how-to-find-out-the-relevant-cause---and-fix-it) ### Reached planting limit [Section titled “Reached planting limit”](#reached-planting-limit) 1. Check your forest(s) in your account under “Review forests”. 2. Do you see that you have reached the planting limit for one of your forests? You will see a message like “You have planted 1000/1000 trees for reviews.”. The first number stands for the number of trees already planted and the second number for the maximum number of trees you have chosen to plant for reviews. In order to activate your forest, you need to raise your planting limit! #### How to raise the planting limit? [Section titled “How to raise the planting limit?”](#how-to-raise-the-planting-limit) 1. Click on “Change planting settings” 2. A modal opens on which you can set a new and higher planting limit or even delete any limit altogether 3. save your changes 4. your forest is active again and you can continue planting ### Manually deactivated forest or subscription [Section titled “Manually deactivated forest or subscription”](#manually-deactivated-forest-or-subscription) **You can reactivate your forests under “Review forests”** 1. Go to “Review forests” and click the green “Reactivate” button 2. Confirm your choice and continue planting **You can reactivate the whole subscription under “Billing & Plan”** 1. Inside “Billing & Plan”; press the “Activate” button 2. confirm your choice Go to “Review forests” and check on your single forests. Do you see them active again? If not; activate them one by one in following step (1.) ### Outstanding invoices [Section titled “Outstanding invoices”](#outstanding-invoices) If there are any unpaid invoices, you’ll see a banner inside your Review forest account. **In order to see and pay the outstanding invoice, click the link on the banner.** You will be re-directed to the payment page (in a new tab) where you can see the details of your outstanding invoice and find the payment options to pay the outstanding invoice. 1. Choose any of the payment methods and make a payment 2. make sure to refresh the page when you come back to your Review forest account. This will update your view of your ReviewForest account and allow you once more access to all features. Tip: you always find an overview of your invoices and the relevant status (including “unpaid”) und “Billing & plan” Happy Planting! # Reactivate your ReviewForest subscription > Get your review forest back in minutes. Just reach out by chat, email or phone and our team will reactivate your ReviewForest subscription for you. If you cancelled your subscription and want to reactivate it, please contact us * via chat, * via email () * or call us (+49 (0)30 692 066 255) and we will gladly set it up with you! Hope to see you soon back with ReviewForest! # Where do I find my invoices at ReviewForest? > How to find your ReviewForest invoices: they arrive automatically by email as a PDF and are always available for download under Billing & Plan. Every invoice is automatically sent by our system as a PDF file by email to the billing email address we have on file for you. Note The email address we send invoices to may differ from the email address of your account. Here’s how to change it: [How to change the email address for invoices](/subscription-invoices/how-to-change-the-billing-email-address/) You can also access all your invoices through our web app. 1. Log in to the web app and go to [*Billing & Plan*](https://app.reviewforest.org/settings/invoices) ![Invoice list under Billing & Plan, with a per-invoice download icon, a breakdown icon, and the time-period selector](/images/articles/en/where-to-find-my-invoices-1.png) 2. Here you have several ways to download invoices: **Download a single invoice** Click the left icon to download the respective invoice. **Download the invoice breakdown** Click the right icon to get a detailed overview of which reviews you were charged tree costs for. **Download all invoices with one click** If you want to download all invoices for your account at once, you can select the desired time period in the top left and then download all invoices with a single click on ‘Download selection’. # Widgets > Add ReviewForest widgets to your website — WordPress, Shopify, Wix, and more. [Upgrade your widgets to Widget V2 ](/widgets/upgrade-your-widgets-to-v2/)Widget V2 loads faster, won't clash with your site's design, and lets you match your brand colors. See why to upgrade and how to do it in one click. [Customize your widget's colors and style ](/widgets/customize-your-widget-colors-and-style/)Match your ReviewForest widget to your brand: set colors, borders and corners in the dashboard, or use CSS custom properties for full control. [How to integrate a widget in WordPress ](/widgets/how-to-integrate-a-widget-in-wordpress/)Add ReviewForest widgets to WordPress in minutes using the Insert Headers and Footers plugin, no theme editing or coding needed to get started. [How to integrate a widget in Shopify ](/widgets/how-to-integrate-a-widget-in-shopify/)Paste the ReviewForest widget into your Shopify theme.liquid file before the closing body tag and show reviews across every page of your store. [How to integrate ReviewForest widgets in Shopware 6 ](/widgets/reviewforest-widgets-in-shopware-6-einbinden/)Add all 7 ReviewForest widgets to Shopware 6.7 — via Shopping Experiences or globally in the footer through a child theme, including CSP and cache tips. [Install ReviewForest widgets on Wix websites ](/widgets/install-reviewforest-widgets-on-wix-websites/)Connect ReviewForest to your Wix site in about five minutes using an HTML Embed block, with both code snippets needed to display your reviews. [How to integrate a widget in Jimdo ](/widgets/how-to-integrate-a-widget-in-jimdo/)Paste the ReviewForest widget code into a Jimdo Widget/HTML element in a few clicks and start showing your reviews and planted trees on any page. [How to integrate a widget in Joomla ](/widgets/how-to-integrate-a-widget-in-joomla/)Drop ReviewForest widgets into Joomla using a Custom HTML module, choose exactly which pages they appear on, and watch your reviews and trees go live. [How to add widgets to Squarespace ](/widgets/how-to-add-widgets-to-squarespace/)Add ReviewForest review score and tree counter widgets to Squarespace in a fixed spot or as a floating badge, with a quick video walkthrough included. [How to customize the forest widget with CSS ](/widgets/how-to-customize-the-forest-widget-with-css/)Style the forest widget to match your website using data-inline-css for quick tweaks or data-css-url to load a full external CSS stylesheet. [Star Ratings in Google Search Results ](/widgets/star-ratings-in-google-search-results/)Earn star rating rich snippets in Google search using the ReviewForest review score widget, plus tips on where to place the code and how to verify it. [Which review score is displayed in the widgets? ](/widgets/which-review-score-is-displayed-in-the-widgets/)Widgets show the score from your connected platform, or a weighted average across several, so platforms with more reviews count more in the total. [Widgets & GDPR ](/widgets/widgets-gdpr/)ReviewForest widgets are GDPR-friendly: no cookies, anonymized IPs, cached reviews, plus a sample privacy policy text you can drop into your site. # Customize your widget's colors and style > Match your ReviewForest widget to your brand. Set colors, borders and corners visually in the dashboard, or use CSS custom properties for full control. With Widget V2 you can style your badge and carousel widgets to match your website. There are two ways to do it: visual controls in the dashboard with no code, or CSS for developers who want full control. Note Color and style customization is available on V2 widgets. If your widget still shows version 1.0, [upgrade it to V2 first](/widgets/upgrade-your-widgets-to-v2/). ## Customize in the dashboard (no code) [Section titled “Customize in the dashboard (no code)”](#customize-in-the-dashboard-no-code) 1. Open **Website widgets**, switch to the **Your widgets** tab, and click the gear icon next to a V2 widget. 2. On **Step 1**, pick a light or dark base and choose which elements to show (logo, button, verification). 3. Go to **Step 2: Appearance**. This is where you set the colors and shape. **Widget:** Background, Text, Secondary text, Border, Border width, and Widget corners (corner roundness). **Button:** Background, Background on hover, Text, Border, Border width, and Button corners. **Stars:** Active star and Inactive star colors. **Drawer (opens on click):** colors and width for the panel that opens when a visitor clicks the badge, including the scrollbar, dividers, muted text, links, and tooltips. ![Step 2 Appearance, showing the widget color controls and a live preview](/images/articles/en/customize-your-widget-colors-and-style-1.png) 4. Watch the live preview on the right update as you change values, then save. Your website picks up the new look automatically. Tip Click a color swatch to pick a color visually, or type a hex value (for example `#1D2023`) for an exact brand match. ## Customize with CSS (for developers) [Section titled “Customize with CSS (for developers)”](#customize-with-css-for-developers) V2 widgets expose a set of CSS custom properties (CSS variables) as a public styling API. Set them on the widget’s container element on your website: ```html
``` Replace `xxxxxxxx` with your widget’s ID (it’s part of the `class` in the snippet you copied from the dashboard). You only need to set the properties you want to change — everything else keeps its default. ### Colors, text and shape (all widgets) [Section titled “Colors, text and shape (all widgets)”](#colors-text-and-shape-all-widgets) | Variable | Controls | | --------------------- | -------------------------------------- | | `--rf-primary` | Button / call-to-action background | | `--rf-primary-text` | Text on the button | | `--rf-primary-hover` | Button background on hover | | `--rf-bg` | Background color | | `--rf-text` | Main text color | | `--rf-text-secondary` | Secondary text color | | `--rf-text-muted` | Muted / meta text color | | `--rf-border` | Border color | | `--rf-border-subtle` | Divider / hairline color | | `--rf-radius` | Corner roundness (container) | | `--rf-radius-button` | Corner roundness (buttons) | | `--rf-font` | Font family | | `--rf-font-size` | Base font size | | `--rf-focus` | Focus-ring color (keyboard navigation) | | `--rf-link` | Link color | | `--rf-link-hover` | Link color on hover | | `--rf-star-filled` | Filled star color | | `--rf-star-empty` | Empty star color | | `--rf-warning-bg` | Warning banner background | | `--rf-warning-text` | Warning banner text | ### Badge widgets only [Section titled “Badge widgets only”](#badge-widgets-only) | Variable | Controls | | -------------------- | ----------------------- | | `--rf-shadow` | Badge drop-shadow | | `--rf-border-width` | Badge border thickness | | `--rf-badge-padding` | Badge inner padding | | `--rf-badge-gap` | Gap between badge areas | | `--rf-badge-hover` | Badge hover background | ### Review drawer (opens on click) [Section titled “Review drawer (opens on click)”](#review-drawer-opens-on-click) | Variable | Controls | | ----------------------- | ------------------------------- | | `--rf-drawer-width` | Drawer panel width | | `--rf-drawer-gap` | Spacing between drawer sections | | `--rf-drawer-shadow` | Drawer drop-shadow | | `--rf-drawer-scrollbar` | Scrollbar color | | `--rf-tooltip-bg` | Tooltip background | | `--rf-tooltip-text` | Tooltip text color | ### Testimonial carousel only [Section titled “Testimonial carousel only”](#testimonial-carousel-only) | Variable | Controls | | -------------------------- | ------------------------------- | | `--rf-slide-width` | Card slide width | | `--rf-slide-gap` | Gap between slides | | `--rf-dot-active` | Active pagination dot color | | `--rf-dot-inactive` | Inactive pagination dot color | | `--rf-dot-scale` | Active dot scale factor | | `--rf-dots-width` | Pagination dots container width | | `--rf-button-border` | Navigation button border color | | `--rf-button-border-width` | Navigation button border width | Dark mode To switch a widget to its dark palette, add `data-rf-theme="dark"` to the container element: `
`. Each `--rf-*` token has its own dark-mode default, and any value you set yourself still wins over both the light and dark defaults. Setting a dark button color? `--rf-primary` is the button’s *background*, not an accent color. If you set it to a dark color, also set `--rf-primary-text` to a light color so the button label stays readable. Fonts must already be loaded If you set `--rf-font` to a webfont like `Inter`, make sure that font is already loaded on your page. The widget does not load webfonts for you. Coming from V1? V1 used the `data-inline-css` and `data-css-url` attributes for styling. V2 badge and carousel widgets use the CSS custom properties above instead. The classic Review forest page widget still uses the old method, see [How to customize the forest widget with CSS](/widgets/how-to-customize-the-forest-widget-with-css/). ## Why your styles stay put [Section titled “Why your styles stay put”](#why-your-styles-stay-put) V2 widgets render inside an isolated container (a Shadow DOM). That means your customizations apply cleanly to the widget, and the widget never accidentally changes the look of the rest of your website. **[Open Website widgets](https://app.reviewforest.org/website-widgets)** # How do I add the ReviewForest widgets on Strato? > Learn how to embed ReviewForest widgets on a Strato website — as a floating overlay via the tracking code, or as a fixed embed in the homepage or webshop builder, with a video guide. In this tutorial we show you how to embed ReviewForest widgets on a Strato website — for example, to display your Google reviews directly on your Strato site. For context: Strato offers two types of websites — the Homepage Builder and the Webshop Builder. We’ll cover both. ## Homepage Builder [Section titled “Homepage Builder”](#homepage-builder) ![The end result](/images/articles/de/wie-fuge-ich-die-reviewforest-widgets-bei-strato-ein-1.png) The right approach here depends on which widget behavior you want: floating or fixed. ### Floating [Section titled “Floating”](#floating) Once you’ve created your [widget code in the ReviewForest app](https://app.reviewforest.org/website-widgets), you need a small trick to make Strato display the widget as a floating overlay. Go to [*Settings – General*](https://strato-editor.com/.cm4all/controlpanel/index/settings/general/) and paste the code into the Tracking Code field. If there is already code there, simply add the ReviewForest code below it. This will insert the widget on every page of your site. ![](/images/articles/de/wie-fuge-ich-die-reviewforest-widgets-bei-strato-ein-2.png) ### Fixed [Section titled “Fixed”](#fixed) If you want the widget to appear in a fixed position, go to *Edit website*, then click *Edit website* again at the bottom right, and select *Content elements*. Under Standard elements, choose *Embed*. Here is a short video that walks you through it: [Guide to adding the fixed widget on Strato](https://www.youtube-nocookie.com/embed/v8rZDYDsRPg) # How to add widgets to Squarespace > Add ReviewForest review score and tree counter widgets to Squarespace in a fixed spot or as a floating badge, with a quick video walkthrough included. We will guide you through the process of installing ReviewForest widgets on your Squarespace website. These widgets, such as the popular review score widget and the tree counter widget, are a great way to enhance your website’s functionality and aesthetic. This article will be divided into two parts: * Installing a widget in a fixed position * Installing a widget as a default floating widget on any page Alternatively you can also watch Leon explain the process in this video: [Watch Leon explain how to add the ReviewForest widgets to a Squarespace website](https://www.youtube-nocookie.com/embed/z6VbGIGV9wM) *** ### 1: Installing a widget in a fixed position [Section titled “1: Installing a widget in a fixed position”](#1-installing-a-widget-in-a-fixed-position) **Step 1: Choose Your Widget** Head over to the ReviewForest platform, select the widget you’d like to use on your website. For the purposes of this guide, we’ll focus on the review score widget. **Step 2: Customization** Customize your widget according to your preference, including its color and whether you’d like to include a “write a review” button. **Step 3: Generate Code** Choose “fixed position” as the widget placement. Click on “next install on website”. You’ll receive a JavaScript code snippet. Copy this code. **Step 4: Insert Code into Squarespace** Go to your Squarespace site editor. Click on the ”+” icon to add a new block, then choose the “Code” block. Paste the code you copied into the block and save the changes. **Step 5: Save and Check** Click “Save” on the top left of the Squarespace editor and check your website to see the new review score widget in your chosen fixed position. ### 2: Installing a widget as a default floating widget on any page [Section titled “2: Installing a widget as a default floating widget on any page”](#2-installing-a-widget-as-a-default-floating-widget-on-any-page) **Step 1: Choose Your Widget** Choose the widget you’d like to add as a floating widget from the ReviewForest platform. **Step 2: Customization** Customize your widget according to your preference. You can add the ReviewForest icon and the logos of the review platforms here. **Step 3: Generate Code** Choose “floating” as the widget’s position. Decide whether you’d like the widget to appear on the bottom left or right of your page. Then, generate the JavaScript code snippet and copy it. **Step 4: Insert Code into Squarespace** Go to your Squarespace site editor and navigate to Settings > Developer Tools > Code Injection. Paste the code into the “Footer” box. **Step 5: Save and Check** Click “Save” on the top left of the Squarespace editor and navigate to any page on your site to see the floating widget in action. *** If you have any questions or run into issues while trying to install the widgets, feel free to reach out to us via email or our chat function. We’re always here to help! # How to customize the forest widget with CSS > Style the forest widget to match your website using data-inline-css for quick tweaks or data-css-url to load a full external CSS stylesheet. Note The `data-inline-css` and `data-css-url` attributes apply to the classic **Review forest** page widget only. For the **V2 badge and carousel widgets**, set colors and style in the dashboard or with CSS custom properties instead, see [Customize your widget’s colors and style](/widgets/customize-your-widget-colors-and-style/). Our Forest widget offers flexible styling options through two key attributes: `data-inline-css` for quick, inline CSS tweaks, and `data-css-url` for linking to an external CSS file when you need more comprehensive customizations. ## Using Inline CSS [Section titled “Using Inline CSS”](#using-inline-css) For swift, minor adjustments, the `data-inline-css` attribute is your go-to solution. It allows you to specify CSS rules directly within the HTML tag. ### Example [Section titled “Example”](#example) Inline CSS ```html
``` In this example, the widget’s title will be bold and colored hot pink. ## Leveraging an External CSS File [Section titled “Leveraging an External CSS File”](#leveraging-an-external-css-file) When you need to apply more complex or extensive styling, the `data-css-url` attribute lets you link to an external CSS file. ### Example [Section titled “Example”](#example-1) External CSS file ```html
``` Here, the widget will load and apply styles from the specified `custom-styles.css` file. ## Combining Both Approaches [Section titled “Combining Both Approaches”](#combining-both-approaches) For maximum flexibility, you can use both attributes together: ```html
``` ## Attribute Details [Section titled “Attribute Details”](#attribute-details) * **`data-inline-css`**: Apply CSS rules directly. Perfect for quick tweaks. * Example: `data-inline-css=".promo__ttl {color: #ff69b4; font-weight: bold;}"` * **`data-css-url`**: Link to an external CSS file. Ideal for comprehensive styling. * Example: `data-css-url="https://your-website.com/path/to/custom-styles.css"` ## Use cases [Section titled “Use cases”](#use-cases) ### Hiding the widget menu [Section titled “Hiding the widget menu”](#hiding-the-widget-menu) To hide the widget menu, the line data-inline-css=“.header {display: none}” can be inserted into the widget snippet. Example: ```html
``` ## Important Notes [Section titled “Important Notes”](#important-notes) 1. Ensure the external CSS file path is correct and accessible from your HTML file location. 2. The widget content is encapsulated within a Shadow DOM, so custom styles applied via these attributes will only affect the widget itself. 3. When using `data-css-url`, make sure your server allows Cross-Origin Resource Sharing (CORS) if the CSS file is hosted on a different domain. 4. For complex layouts or responsive designs, we recommend using the external CSS file approach. By utilizing these attributes, you can tailor the appearance of your widget to seamlessly integrate with your website’s design and meet your specific style requirements. Need further assistance? Don’t hesitate to reach out to our support team! # How to integrate a widget in Jimdo > Paste the ReviewForest widget code into a Jimdo Widget/HTML element in a few clicks and start showing your reviews and planted trees on any page. In the following, we will show you how to integrate a widget in Jimdo. 1. To add a widget to Jimdo, first visit our website and log in. 2. Click on “Widgets” on the left and then on “Review Widget” or “Forest Widget”. Select a widget and click “Install”. ![ReviewForest Widgets](/images/articles/en/how-to-integrate-a-widget-in-jimdo-1.png) 3. Choose between “Floating widget” and “Badge widget” as well as the position (top left, bottom right …) and copy the HTML code to the clipboard (attention: there are two HTML codes for the “forest widget”). 4. Now log in to Jimdo and call up the desired subpage. 5. Click on “Edit”, then on “Add element” and “Additional elements”. 6. Select “Widget / HTML”. ![](/images/articles/en/how-to-integrate-a-widget-in-jimdo-2.png) 7. Here you can insert the HTML code(s) we have generated. 8. Finally click on “Save”. If the widget is not displayed immediately, reload your browser once. # How to integrate a widget in Joomla > Drop ReviewForest widgets into Joomla using a Custom HTML module, choose exactly which pages they appear on, and watch your reviews and trees go live. In order to integrate a widget in Joomla, first you need to copy the widget HTML-Codes provided by ReviewForest. If you already done so you can skip the next four steps and directly go to step five. 1. Visit and login into your account. 2. Choose “Widgets” within the left hand menu or directly visit . You can choose between “Review Widget” and “Forest Widget”. For this article we go through the steps in order to integrate the Forest Widget. But the necessary steps will work with the Review Widget as well. 3. After you have chosen one of the widgets, you need to click on the button “Install” which you find on the right side of the widget preview. ![Install Forest Widget](/images/articles/en/how-to-integrate-a-widget-in-joomla-1.png) 4. Now a window should show up. At first copy the upper HTML-Code but leave the window open as you will need the second HTML-Code later as well. ![Copy HTML-Code](/images/articles/en/how-to-integrate-a-widget-in-joomla-2.png) 5. Within a new Browser window, go to your Joomla website. Here you need to create a “HTML-Code Module”. Within your Control Panel navigate to “Extensions” and then to “Module manager”. 6. Click on “New” in order to create a new module and choose “Custom HTML” ![HTML-Code](/images/articles/en/how-to-integrate-a-widget-in-joomla-3.png) 7. Define a name and make a choice about the position in which the widget should be shown on your Website. Now you can insert the already copied HTML-Code. In pressing enter you’ll create a new line where you can insert the second HTML-Code. For this go back to your ReviewForest account copy the second code and insert it on Joomla behind the first HTML-Code. ![Insert HTML-Code](/images/articles/en/how-to-integrate-a-widget-in-joomla-4.png) 8. Now you can use the visual mode or take the path via clicking on “Tools” and then “Source Code” to see the HTML-Code. 9. In a following step you can open “Menu assignment” and specify those pages on which the HTML Module should be shown. ![Auswahl der Anzeigeseiten](/images/articles/en/how-to-integrate-a-widget-in-joomla-5.png) 10. Finally don’t forget to save your changes. In refreshing your website afterwards you can check out the outcome. # How to integrate a widget in Shopify > Paste the ReviewForest widget into your Shopify theme.liquid file before the closing body tag and show reviews across every page of your store. In the following, we will show you how to integrate a widget in Shopify. 1. First of all, visit our website and log in. 2. Click in the menu on the left on “Widgets” and then on “Review Widget” or “Forest Widget”. Select a widget and click “Install”. 3. Choose between “Floating widget” and “Badge widget” as well as the position (top left, bottom right …) and copy the HTML code to the clipboard (attention: there are two HTML codes for the “forest widget”) . 4. Go to Shopify admin panel and log in to the backend. Then click on “Online Store”, then on “Actions” on the right and select “Edit code” in the drop-down menu. ![Shopify/Online Store/Actions/Edit code](/images/articles/en/how-to-integrate-a-widget-in-shopify-1.png) 5. Click on “Themes” on the left and under “Layout” on “theme.liquid”. ![Shopify/theme.liquid](/images/articles/en/how-to-integrate-a-widget-in-shopify-2.png) 6. In the window on the right, into the bottom before the `` tag, you can now copy the ReviewForest HTML code you copied at the beginning. ![Inserting the HTML code](/images/articles/en/how-to-integrate-a-widget-in-shopify-3.png) 7. Click on “Save”. # How to integrate a widget in WordPress > Add ReviewForest widgets to WordPress in minutes using the Insert Headers and Footers plugin, no theme editing or coding needed to get started. In the following, we will show you how to integrate a widget in WordPress. 1. First of all, visit our website and log in. 2. Click in the menu on the left on “Widgets” and then on “Review Widget” or “Forest Widget”. Select a widget and click “Install”. 3. Choose between “Floating widget” and “Badge widget” as well as the position (top left, bottom right …) and copy the HTML code to the clipboard (attention: there are two HTML codes for the “forest widget”) . 4. Inserting HTML codes into WordPress via a plugin is the simplest option. Install and activate the WordPress extension “Insert Headers and Footers” and open it by clicking on “Settings” in the menu and then on the name of the plugin. A window with two fields opens. ![Insert Headers and Footers" Settings](/images/articles/en/how-to-integrate-a-widget-in-wordpress-1.png) 5. Now paste the previously copied HTML code of our widget in the header or footer and click on “Save”. # How to integrate ReviewForest widgets in Shopware 6 > Add all 7 ReviewForest widgets to Shopware 6.7 — via Shopping Experiences or globally in the footer through a child theme, including CSP and cache tips. No matter which of our **7 widgets** you want to use — from the tree counter widget and the testimonial widget to the badge widgets — integrating them into your Shopware 6 store (version 6.7.x) always works the same way. ## Your widget code (structure) [Section titled “Your widget code (structure)”](#your-widget-code-structure) Every widget consists of two building blocks that you copy into your store together: 1. **The script:** it loads the functionality from our servers. 2. **The placeholder (div):** it tells Shopware exactly where the widget should appear. **Here’s what the structure looks like:** Widget code ```html
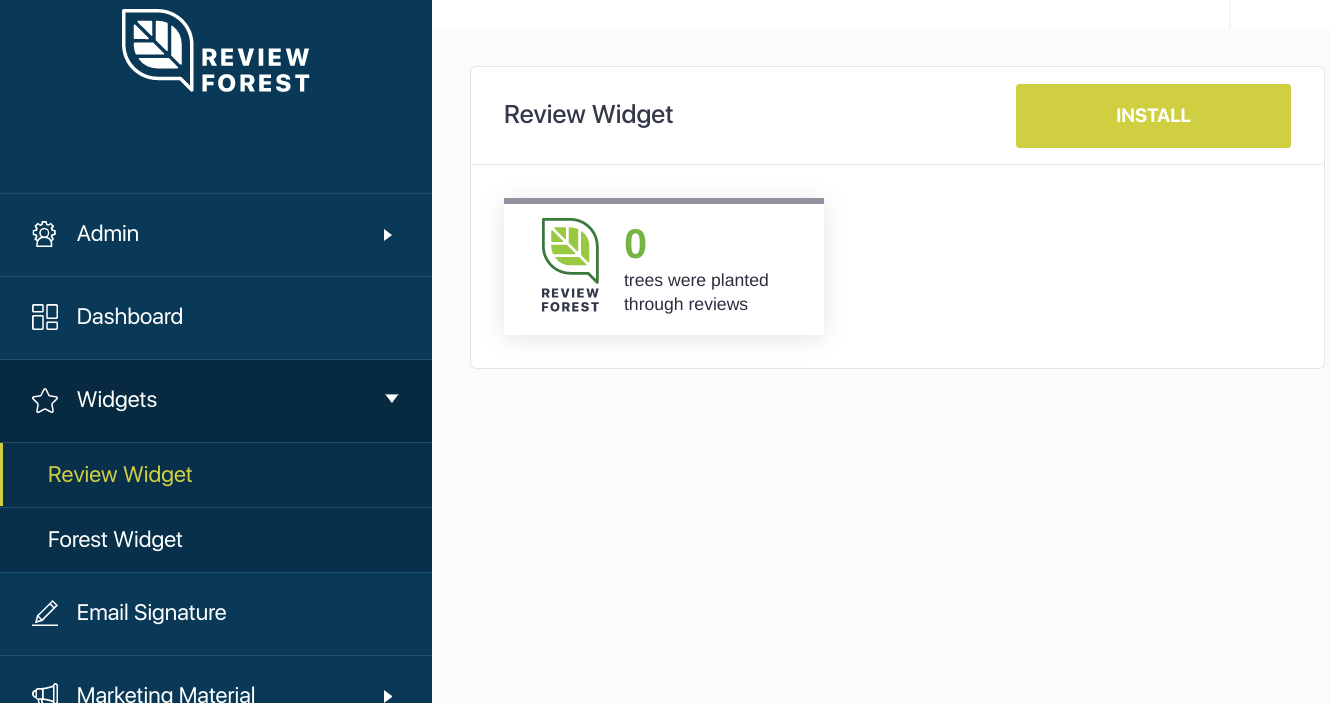
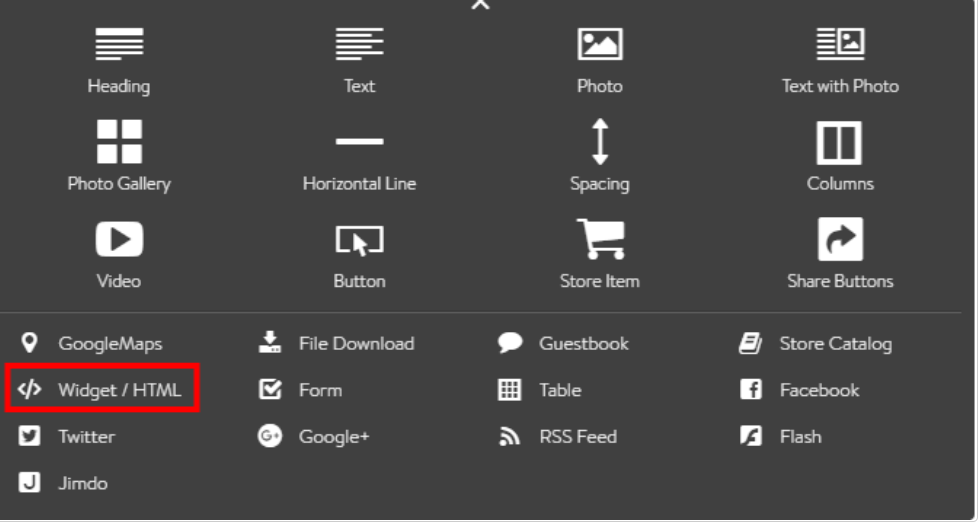
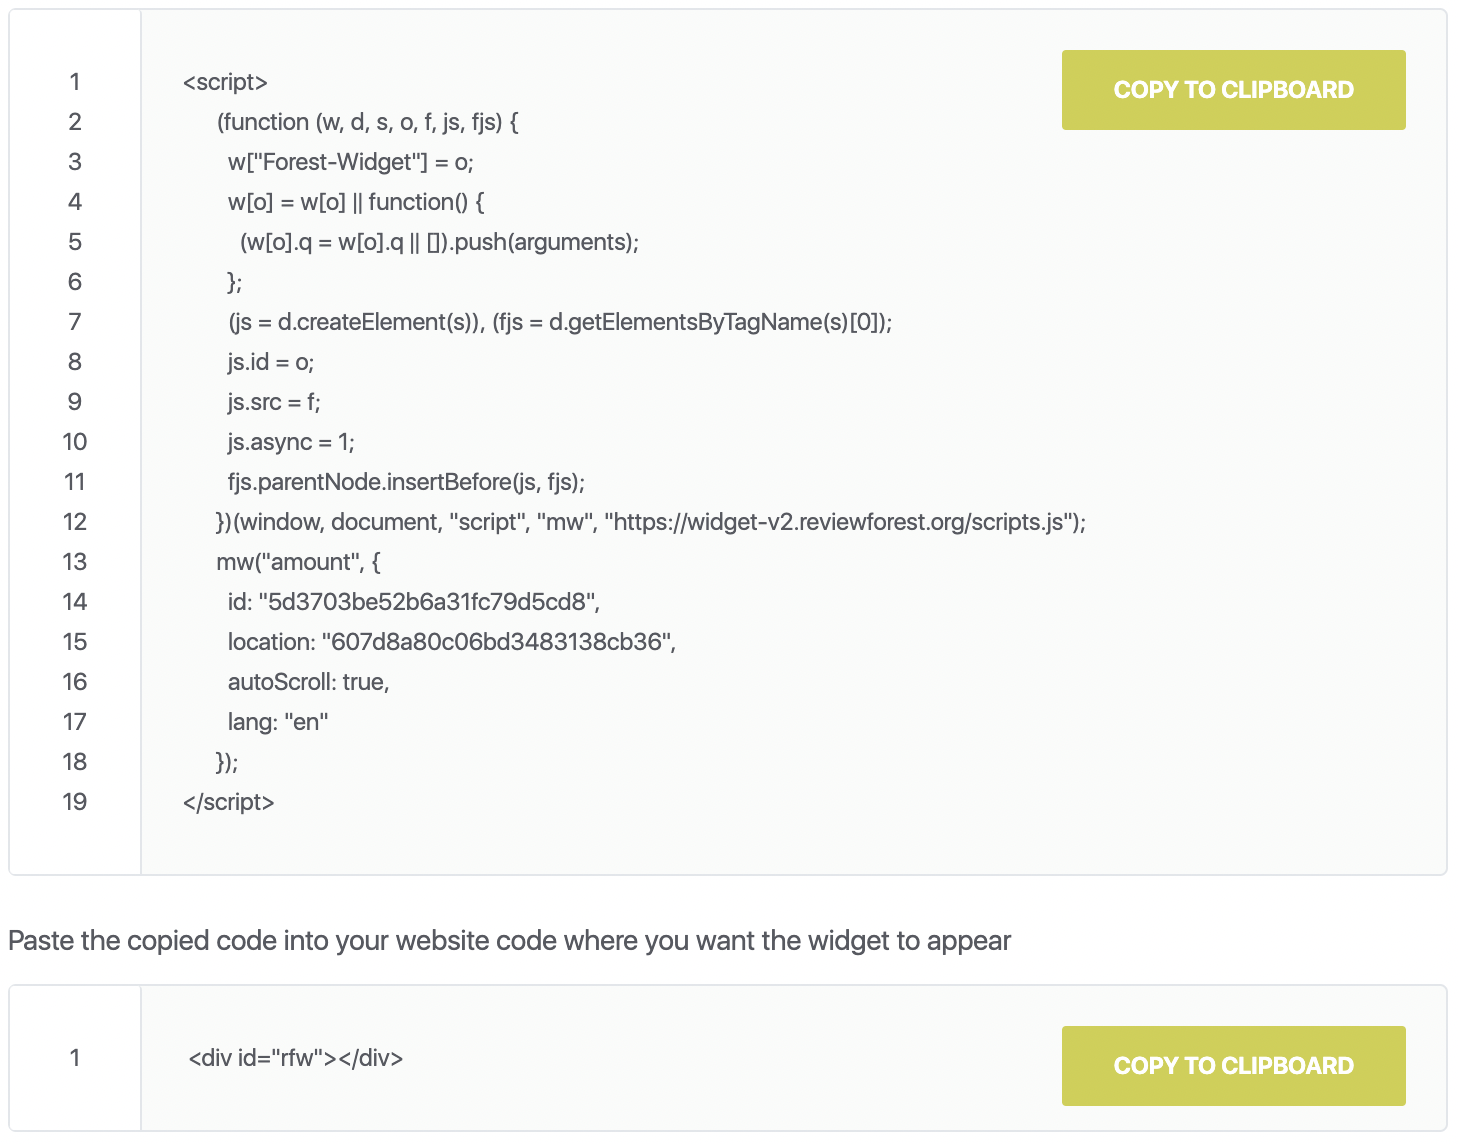
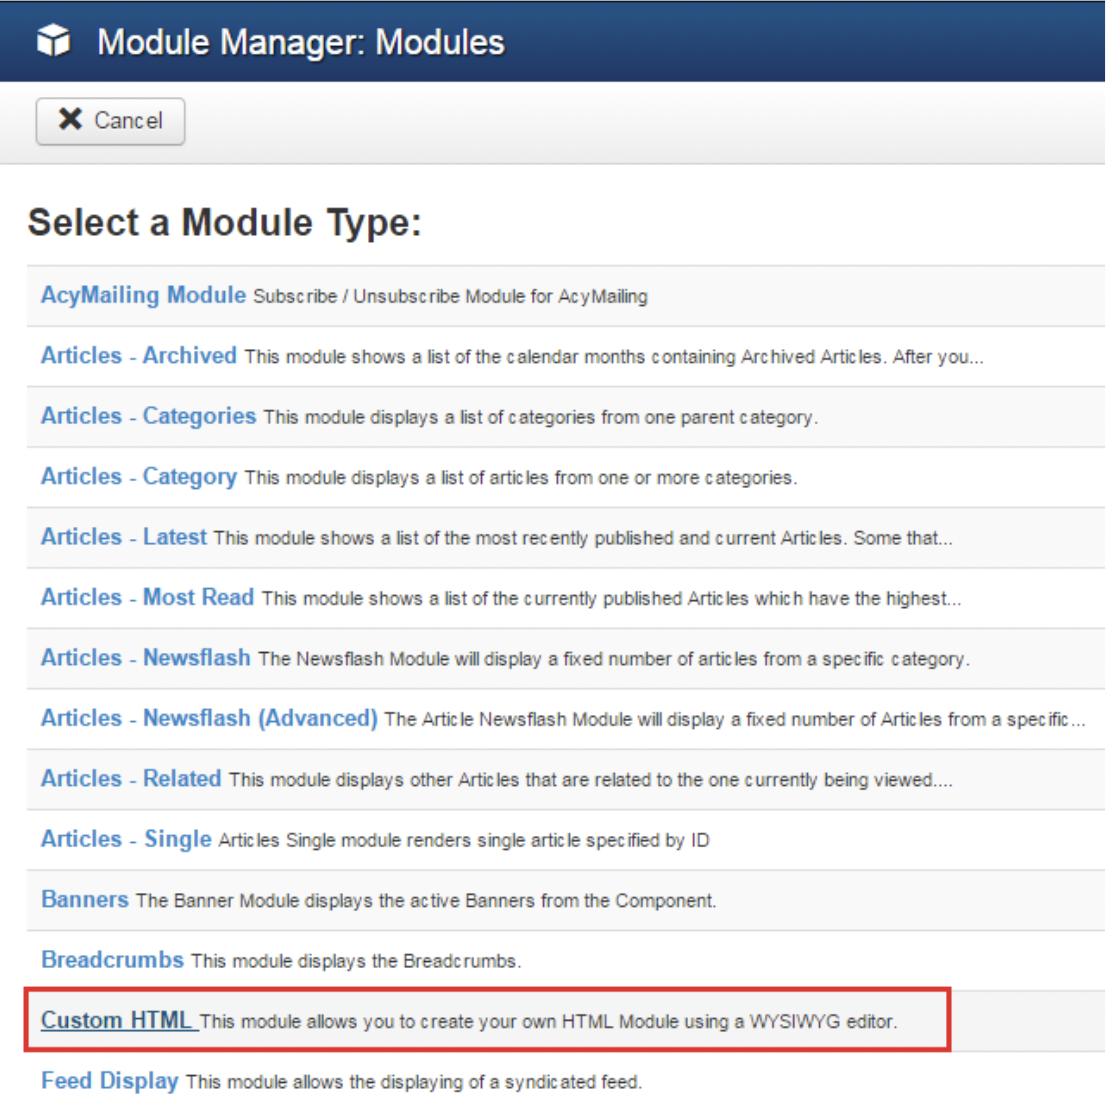
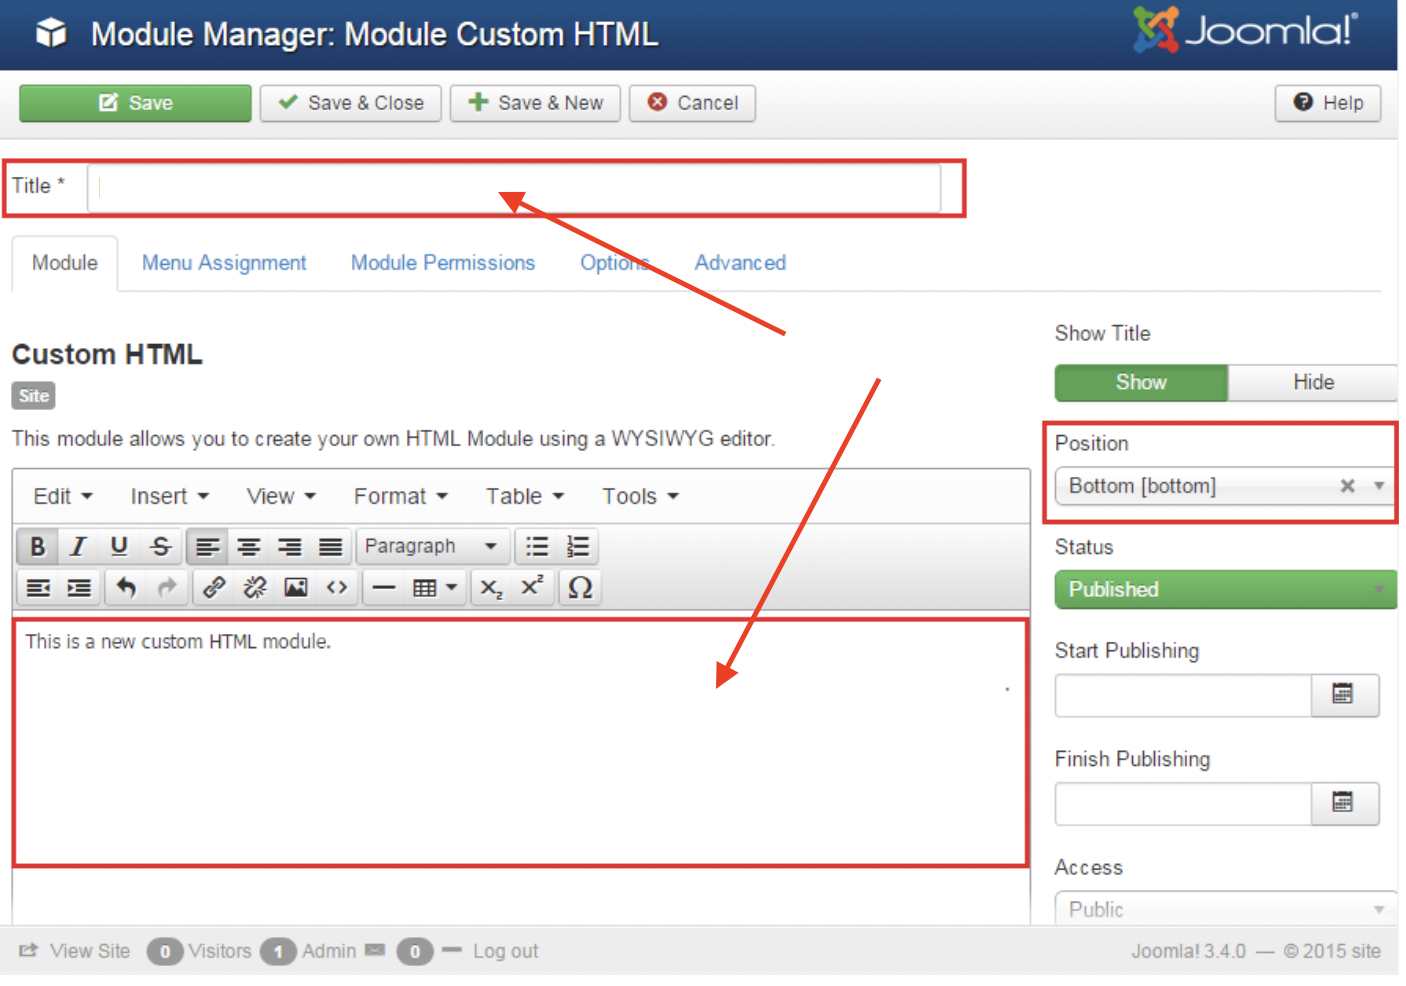
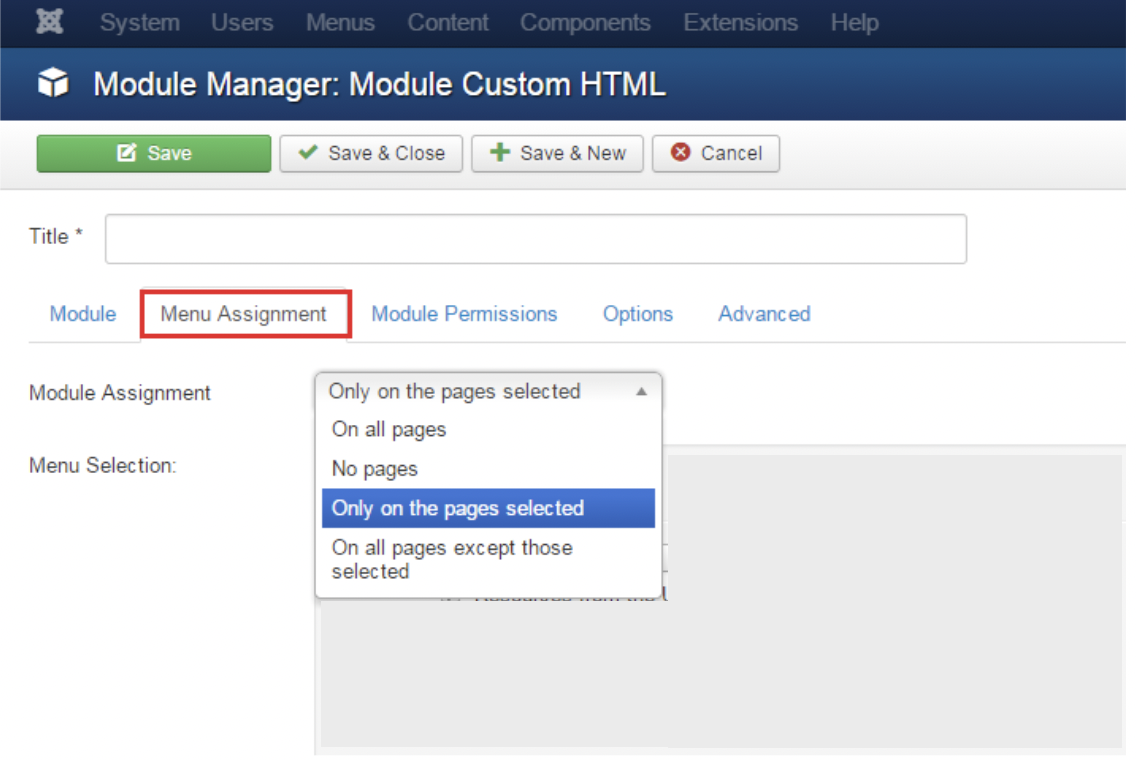

``` ## Step by step: integration via Shopping Experiences [Section titled “Step by step: integration via Shopping Experiences”](#step-by-step-integration-via-shopping-experiences) *This is the easiest way if you want to place the widget flexibly on your homepage or in a category.* 1. **Open the admin area:** Log in to your Shopware backend. 2. **Choose a layout:** Go to **Content > Shopping Experiences** and open the layout for your page. 3. **Add a block:** Click the **plus icon (+)** and, under the “Text” category, choose a simple **Text block**. Drag it to the spot where the widget should appear. 4. **Enable code mode:** Click the text field you just placed. In the toolbar at the top you’ll find the **`` (source code)** icon. Click it. 5. **Insert the widget:** Delete any sample text and paste your complete widget code (script + div) there. 6. **Save & check:** Click **Save** in the top right. Reload your store in the browser to see the result. ### What to watch out for [Section titled “What to watch out for”](#what-to-watch-out-for) #### 🛡️ The “security check” (CSP) [Section titled “🛡️ The “security check” (CSP)”](#️-the-security-check-csp) Some stores have very strict security rules (Content Security Policy). If your widget doesn’t appear, Shopware is blocking the loading of external content. * **Solution:** Ask your technical team to add the domain `reviewforest.org` to the “whitelist” (allow list). #### 🍪 Data protection & cookies [Section titled “🍪 Data protection & cookies”](#-data-protection--cookies) Since the widget loads data from ReviewForest, you should register it in your **cookie consent tool** (consent manager). That keeps you on the safe side when it comes to GDPR. #### 📱 Mobile view [Section titled “📱 Mobile view”](#-mobile-view) Our widgets are “responsive,” so they adjust automatically. If it ever looks a bit too wide on a smartphone, your admin can help out with a single line of CSS (e.g. `max-width: 100%;`) so everything fits perfectly. ## Pro tip: embed the widget globally in the footer [Section titled “Pro tip: embed the widget globally in the footer”](#pro-tip-embed-the-widget-globally-in-the-footer) If you want your ReviewForest widget to appear on every page of your store (at the bottom, above the legal notice or the payment methods), you’ll need to make a small change to your design code (theme). **Prerequisite:** You should have access to your store’s files (via FTP or through your development agency) and use your **own theme** (don’t make changes directly in Shopware’s “Default” theme!). ### Step 1: Find the right file [Section titled “Step 1: Find the right file”](#step-1-find-the-right-file) Navigate to the following path in your store directory: `YOUR_THEME/src/Resources/views/storefront/layout/footer/footer.html.twig` *If the file doesn’t exist there yet, just create it. It’s used to extend Shopware’s default footer.* ### Step 2: Insert the code [Section titled “Step 2: Insert the code”](#step-2-insert-the-code) Copy the following block into the file. It makes your widget appear in the right place without deleting the rest of the footer: footer.html.twig ```twig {% sw_extends '@Storefront/storefront/layout/footer/footer.html.twig' %} {% block layout_footer_navigation %} {# The original footer content is preserved #} {{ parent() }} {# This is where we embed your ReviewForest widget #}
{% endblock %} ``` ### Step 3: Clear the cache [Section titled “Step 3: Clear the cache”](#step-3-clear-the-cache) For Shopware to notice the change, you need to clear the cache. You can do this either in the admin area under **Settings > System > Caches & indexes** or via the console (terminal): `bin/console cache:clear` ### Step 4: Recompile the theme [Section titled “Step 4: Recompile the theme”](#step-4-recompile-the-theme) In some cases you’ll need to rebuild the theme once so the script gets linked correctly: `bin/console theme:compile` ### What your technical team needs to know (short facts) [Section titled “What your technical team needs to know (short facts)”](#what-your-technical-team-needs-to-know-short-facts) If you’d rather not do this yourself, just copy this part into an email to your agency: * **Goal:** Embed the global ReviewForest widget in Shopware 6.7.x. * **Integration:** Via a child theme in `footer.html.twig`. * **Placement:** Ideally in the `layout_footer_navigation` or `layout_footer_bottom` block. * **Important (CSP):** Please check the **Content Security Policy**. The domain `widgets.reviewforest.org` must be allowed for `script-src` and `connect-src` so the widget can load its data. * **Performance:** The script uses `defer`, so it doesn’t negatively affect rendering. # Star Ratings in Google Search Results > Earn star rating rich snippets in Google search using the ReviewForest review score widget, plus tips on where to place the code and how to verify it. Our review score widget allows you to easily integrate rich snippets with review data on your website. Rich snippets are a powerful tool for enhancing your website’s search engine visibility, as they usually boost your click-through rates. In this article, we will guide you on how to use our widget to add review data to your website and ensure that your rich snippets comply with Google’s guidelines. Note Displaying star ratings in search results cannot be guaranteed, as it is entirely dependent on Google and beyond ReviewForest’s direct control. We recommend, in line with Google’s advice, not to include the script on your website’s homepage but on subpages that have content directly related to the reviews. If you still want to include the script on your homepage, note that Google often only awards stars once all subpages have successfully received stars. However, there is no guarantee that Google will grant stars to your homepage. **Checking the Implementation:** After implementing the review score widget, you can use [Google’s Rich Snippet Testing Tool](https://search.google.com/test/rich-results) to verify whether the script has been correctly integrated on your web server and is recognized by Google. If everything is in order, you should find a review snippet in the structured data section. The speed at which the stars appear depends on how frequently Google crawls your website, which usually takes several days. If you have an account for your website in the Google Search Console, you can expedite this process by re-indexing the pages where the script is embedded (enter the URL of the subpage in the tool’s search bar, confirm, and then click “Re-index”). In the Google Search Console, you can also check whether your rich snippet has been correctly integrated. To do this, go to the ‘Enhancements’ category in the left sidebar menu and find ‘Review Snippets’. Here, you will see errors, warnings, and valid pages for the implemented snippet. Make sure to read our How To Article: [Add Star Ratings in Google Organic Search Results](https://blog.reviewforest.org/how-to/add-star-ratings-in-google-organic-search-results/) # Upgrade your widgets to Widget V2 > Widget V2 loads faster, won't clash with your site's design, and lets you match your brand colors. Here's why to upgrade and how to do it in one click. ReviewForest Widget V2 is a complete rebuild of our badge and carousel widgets. They load much faster, no longer interfere with your website’s styling, and you can finally customize their colors to match your brand. Upgrading takes one click, and the embed code on your website stays exactly the same. ## Why upgrade [Section titled “Why upgrade”](#why-upgrade) **Faster loading and better PageSpeed.** V2 widgets are about 60% smaller (roughly 135 KB down to 55 KB). If Google PageSpeed ever flagged your ReviewForest widget as a speed issue, V2 is the fix. **No more style conflicts.** Each V2 widget runs in its own isolated container (a “Shadow DOM”). Your website’s CSS can’t accidentally break the widget, and the widget’s styles can’t leak out and affect the rest of your page. **Custom colors and style.** You can adjust the background, text, border, corner roundness and button colors so the widget fits your brand. See [Customize your widget’s colors and style](/widgets/customize-your-widget-colors-and-style/). **Built-in accessibility.** V2 widgets ship with screen-reader labels, keyboard navigation and proper color contrast, so they work for everyone who visits your site. ## Which widgets can be upgraded [Section titled “Which widgets can be upgraded”](#which-widgets-can-be-upgraded) The upgrade is available for the badge and carousel widgets: * Review score badge * Tree counter badge * 2 in 1 badge * Mini review score * Mini tree counter * Carousel The Review forest widget (the full review-forest page widget) keeps its current version for now, so it has no upgrade button. ## How to upgrade [Section titled “How to upgrade”](#how-to-upgrade) 1. Open **Website widgets** in the left menu and switch to the **Your widgets** tab. 2. Look at the **Version** column. Any widget that can be upgraded shows a green **Update to V2.0** link. ![The "Your widgets" tab with a green "Update to V2.0" link in the Version column](/images/articles/en/upgrade-your-widgets-to-v2-1.png) 3. Click **Update to V2.0**. A short summary of what the update includes appears. ![The "Version 2.0 updates include" confirmation dialog](/images/articles/en/upgrade-your-widgets-to-v2-2.png) 4. Click **Update to V2.0** again to confirm. That’s it. The widget code already on your website does not change, and there is nothing to re-paste. Your customizations reset to V2 defaults When you upgrade, your current widget settings (colors, displayed elements, button) are replaced with the V2 defaults. Open the widget’s settings afterward to re-apply your look. See [Customize your widget’s colors and style](/widgets/customize-your-widget-colors-and-style/). Note Upgrading is a one-way change from your dashboard. If something doesn’t look right after the update, reach out to our support team and we’ll help you sort it out. ## After upgrading [Section titled “After upgrading”](#after-upgrading) 1. Open the widget’s settings (the gear icon in the **Actions** column). 2. Set your colors and style on the **Appearance** step, and check the live preview. 3. Save. Your website picks up the new look automatically. Want to fine-tune the look? Head to [Customize your widget’s colors and style](/widgets/customize-your-widget-colors-and-style/). **[Open Website widgets](https://app.reviewforest.org/website-widgets)** # Which review score is displayed in the widgets? > Widgets show the score from your connected platform, or a weighted average across several, so platforms with more reviews count more in the total. #### There are two answers to this question. [Section titled “There are two answers to this question.”](#there-are-two-answers-to-this-question) Your widget is synchronized with your review forest. It accesses the data of the connected review platform(s). So if you have a ***simple review forest*** that is connected to only one review profile on one review platform (e.g. Google), then all your widgets will display the review score that your business has on that platform. If your ***review forest is connected to several of your profiles on different platforms***, your widget displays the **weighted average** as the review score. \_\_This means: \_\_platforms with more reviews have a greater influence on the overall score than platforms with fewer reviews. ### Example [Section titled “Example”](#example) Your review forest is connected to two review platforms. On the platforms your business have different review scores and a different number of reviews. * Platform A: ⭐️ 4.4 with 569 reviews * Platform B: ⭐️ 3.2 with 10 reviews **The weighted average is calculated as follows:** \[(ReviewScoreA × ReviewNumberA) + (ReviewScoreB × ReviewNumberB)] ÷ (ReviewNumberA + ReviewNumberB) **And if we insert the values from the example, the following is calculated:** \[(4.4 × 569) + (3.2 × 10)] ÷ (569 + 10) Rounded, this results in a weighted review score of 4.4. So in this example, the widget will display 4.4 as the review score on the widget. ### Why do we use the weighted average? [Section titled “Why do we use the weighted average?”](#why-do-we-use-the-weighted-average) There are two reasons for this: * A review score with many reviews is more meaningful than one with only a few. * Weighting ensures that the overall score reflects the actual customer experience as accurately as possible. # Widgets & GDPR > ReviewForest widgets are GDPR-friendly: no cookies, anonymized IPs, cached reviews, plus a sample privacy policy text you can drop into your site. ## Widget Privacy Policy [Section titled “Widget Privacy Policy”](#widget-privacy-policy) Our widgets (Review Score, Tree Counter, and Forest Widget) are embedded in your website using JavaScript code. We take privacy very seriously and adhere to the following principles: * We do not store any personal visitor data and anonymize IP addresses immediately after collection * We do not use cookies * We do not load external fonts (such as Google Fonts) * No data is loaded from external review platforms. Reviews from Google and other review platforms are cached on our servers * Our servers are located in Frankfurt We use a CDN (Content Delivery Network) called Cloudflare, which ensures that the widgets on your site can be loaded quickly from anywhere in the world. The data is loaded from servers in close proximity to the visitor’s location. This means that, for example, data for an American website visitor may be loaded from American servers. An adequate level of data protection is ensured by an adequacy decision of the EU Commission. Cloudflare is certified under the EU-U.S. Data Privacy Framework (DPF). Tip There’s also an advantage for your website visitors when you use ReviewForest widgets. All reviews are cached on our servers. This means no direct connection is established between your visitors and review platforms like Google. ## How to list the widgets in your privacy policy [Section titled “How to list the widgets in your privacy policy”](#how-to-list-the-widgets-in-your-privacy-policy) When using ReviewForest widgets on your website, you should update your privacy policy. This sample text has been created with the utmost care, but we cannot guarantee its completeness or accuracy. ### Sample text [Section titled “Sample text”](#sample-text) **ReviewForest Widgets** On our website, we use widgets from ReviewForest GmbH, Großbeerenstr. 11, 10963 Berlin, Germany. These widgets (Review Score, Tree Counter, and Forest Widget) display reviews from various platforms and the number of trees planted. The ReviewForest widgets are elements embedded in our website that display dynamic information. When our webpage is accessed, a connection is established with ReviewForest’s servers to display up-to-date content. ReviewForest receives technical data (access data), including the user’s IP address, which is anonymized immediately after collection. The anonymized data is stored for a maximum of 7 days and used only for statistical purposes and error analysis. ReviewForest uses Cloudflare’s Content Delivery Network (CDN) for fast, worldwide delivery of the widgets. Depending on the visitor’s location, data may also be processed outside the EU. An adequate level of data protection is ensured by Cloudflare’s certification under the EU-U.S. Data Privacy Framework (DPF). Data processing is carried out on the basis of our legitimate interests pursuant to Art. 6(1)(f) GDPR, to present our users with current information about the quality of our services and our commitment to sustainability. ReviewForest implements technical and organizational security measures to protect the data. We are jointly responsible with ReviewForest for data processing in accordance with Art. 26 GDPR. Users can assert their data subject rights directly against ReviewForest. Further information on data processing, data subject rights, and opt-out options can be found in ReviewForest’s privacy policy: